Javascript for Toonboom
In toonboom the extension language is Javascript. We can use their extensive API to automate and extend our workflows to make us more effectient as artists and help teams and studios work more efficently.
Before we jump in we should understand some basic things about how ToonBoom is built. The most important is the framework we will be interacting with.
# QT
A large part of ToonBoom is built using a framework called QT.
Qt is a cross-platform software development framework and application development toolkit used for creating applications that run on multiple platforms, including Windows, macOS, Linux, Android, and iOS. It was originally developed by the Norwegian company Trolltech, which was later acquired by Nokia, and is now developed and maintained by the Qt Company.
Qt provides a set of APIs for developing graphical user interfaces (GUIs), as well as a range of other functionality, including networking, databases, multimedia, and more. It also includes a powerful development environment, the Qt Creator, that provides a visual editor for designing user interfaces and a code editor for writing and debugging code.
In addition to C++, Qt supports scripting languages, including Python, JavaScript (through QtScript), and Ruby, which makes it accessible to a wider range of developers with different backgrounds and skill sets. Qt is widely used in a variety of industries, including automotive, finance, healthcare, and media and entertainment.
# Toonboom and QT
Harmony 22 Premium Documentation: About Scripting
Toonboom infact uses Qt Script which is similar to javascript. In fact it’s based on JavaScript. Which is why we are focusing on learning Javascript first.
# QTScript
QtScript is a scripting language based on JavaScript and specifically designed for the Qt framework. It provides a set of APIs for accessing the application’s user interface and objects, and enables the creation of macros and scripts for automating repetitive tasks in Qt applications.
QtScript is easy to learn and use, especially for developers with a background in JavaScript, and provides a more streamlined interface for accessing the application’s functionality compared to using the Qt C++ API. QtScript scripts are typically used for simple tasks and can be easily integrated into larger projects, which makes them a convenient tool for rapid prototyping and testing.
QtScript has a number of features and capabilities that make it well-suited for use in Qt applications, including support for multithreading, garbage collection, and the ability to handle and respond to events. It also provides access to the full range of Qt APIs, which enables the creation of powerful and flexible scripts and macros.
# First Steps for Scripting in ToonBoom
Harmony Scripting | Toon Boom Learn
To clear up some confusion about javascript vs qtscript in toonboom. Qt Scripts still use the .js file extension and are basically javascript. The only notable difference is the way we use javascript/qtscript in this case. We use it through the ToonBoom QT api instead of it targeting webassembly for the browsers.
# Getting Started
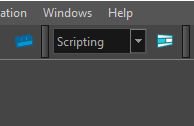
Navigate to the Scripting workspace:
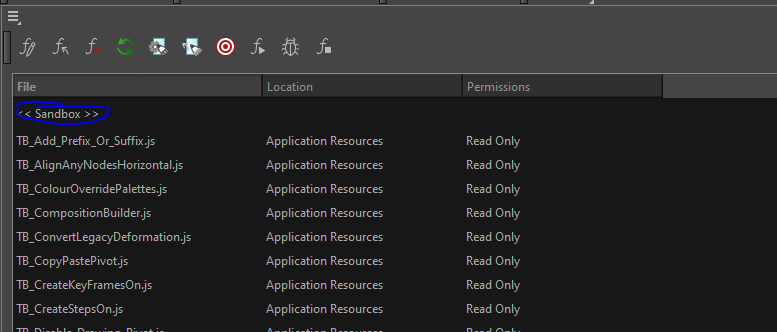
The scripting window shows a list of scripts you can use.
The Sandbox script is a special script that is discarded after use. Good for testing things out.
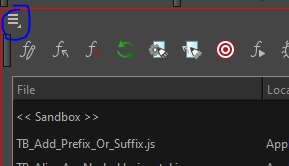
To create a new script use the hamburger menu at the top left of the scripting window and select: File -> new script:
Then enter the name of your script. After that select where you wish it to be stored.
# Below are the storage locations:
- Windows:
- Toon Boom Harmony Premium:
C:\Users\[user_name]\AppData\Roaming\Toon Boom Animation\Toon Boom Harmony\1400-scripts - Toon Boom Harmony Advanced:
C:\Users\[user_name]\AppData\Roaming\Toon Boom Animation\Toon Boom Advanced\1400-scripts - Toon Boom Harmony Essentials:
C:\Users[\user_name]\AppData\Roaming\Toon Boom Animation\Toon Boom Essentials\1400-scripts
- Toon Boom Harmony Premium:
- macOS:
- Toon Boom Harmony Premium:
/Users/[user_name]/Library/Preferences/Toon Boom Animation/Toon Boom Harmony/1400-scripts - Toon Boom Harmony Advanced:
/Users/[user_name]/Library/Preferences/Toon Boom Animation/Toon Boom Advanced/1400-scripts - Toon Boom Harmony Essentials:
/Users/[user_name]/Library/Preferences/Toon Boom Animation/Toon Boom Essentials/1400-scripts
- Toon Boom Harmony Premium:
On macOS, the Library folder is a hidden folder. To display the display the folder, told down the Alt key.
- Linux:
/home/[user_name]/Toon Boom Animation/Toon Boom Harmony/1400-scripts//home/[user_name]/Toon Boom Animation/Toon Boom StageAdvanced/1400-scripts/
When working with Harmony Server, your custom scripts are stored in:
- Global:
[Server_Name] > USA_DB > scripts - Environment:
[Server_Name] > USA_DB > environments > [environment_name] - Job:
[Server_Name] > USA_DB > jobs > [job name] - User:
[Server_Name] > USA_DB > users > [user_name] > stage > 1400-scripts
You may want to utilize git to save your tools.
For this course I do expect your toonboom scripts to be turned in with a github url.
# The Script Editor UI
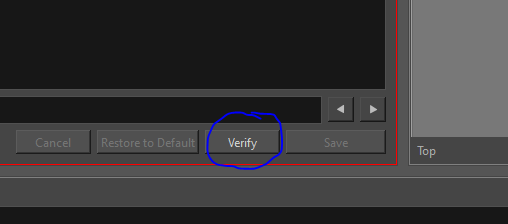
Once you write something in the editor, you can quickly check your syntax with the verify button:
To run a script, do the one of the following:
- From the script editor toolbar click the run script button:
- From the script editor menu, select Play/Debug > Run
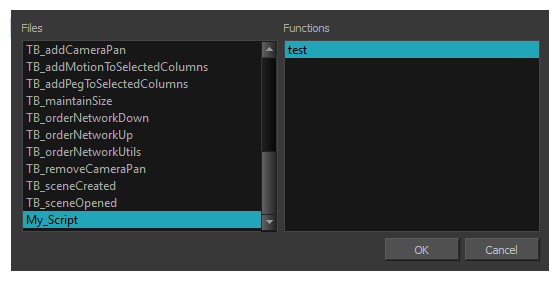
To avoid selecting the function every time you want to run your script, you can set a target function. In the Script Editor toolbar, click the Set Target!
button or select Play/Debug > Set Target from the Script Editor menu. In the Function column, select the function to target and press OK.
Now your script will appear in the menu:
To stop the execution of a script click the  stop script button.
# Debugging QT Scripts
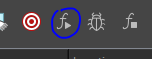
To run the debugger in toonboom click the  debugger button in the toolbar.
This will bring up the the debugger:
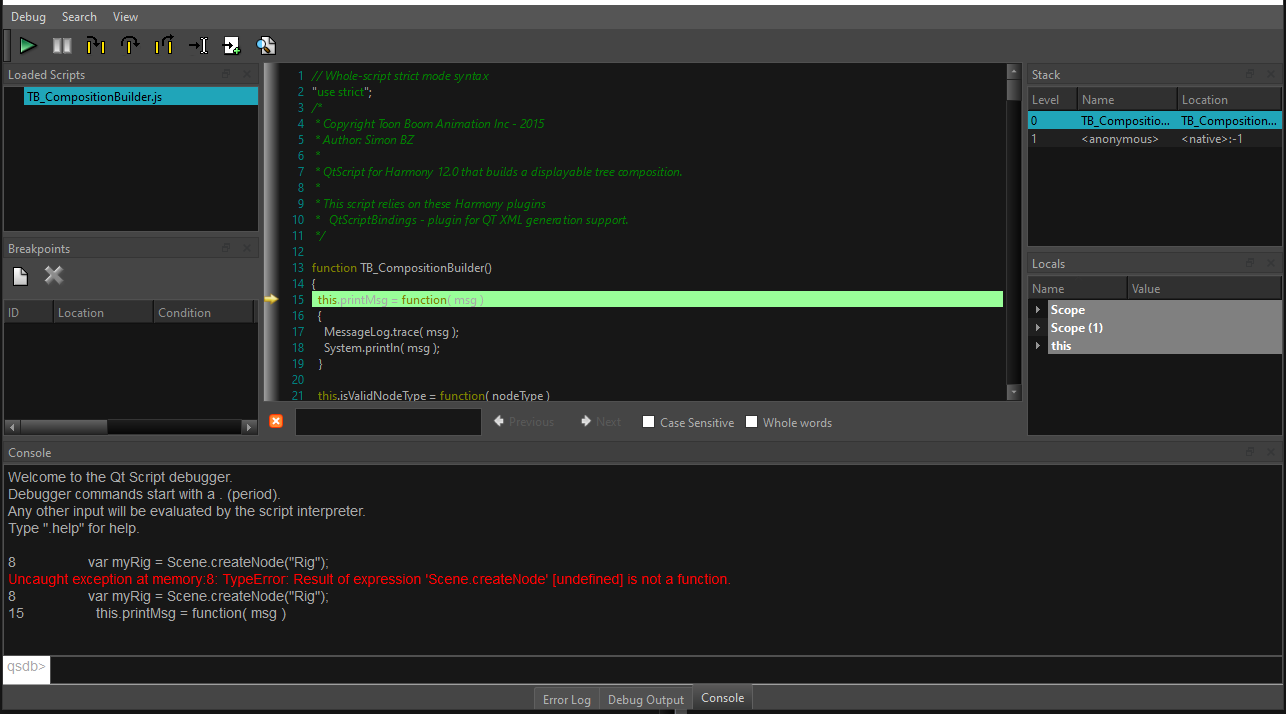
The debugger will allow us to set breakpoints and step through our code to find problems easier.
# Importing Scripts
To use scripts prepared by other users, transfer the *.js files from the computer where the scripts were created to the one that you intend to use. Then use the Script Editor to import the *.js files from where they are saved on your computer.
When working with Harmony Stand Alone, scripts that you created while working on a scene or imported are available for all other projects created on the same computer; there’s no need for any kind of transfer or import. You can find your custom, default and imported scripts in:
Refer back to the script locations: Script Paths
# External Script Editors
You can set and open an external script editor with the respective buttons on the toolbar:
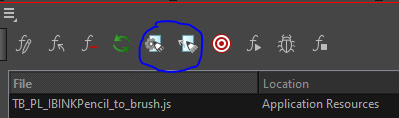
To set the external script editor copy the path into the field to the exectable or navigate to it.
# Creating A Simple Script
You will create a script with either the built-in script editor or your external editor of choice.
# Documentation
It’s important to read and reference the documentation for any sort of complex project. The relivant documentation is linked below:
# Getting Started: Simple Script
To find most parameters to use in your script, you can refer to a Harmony project
*.xstagefile. When opening the file in a text or script editor, you can see all layers, nodes, values, and parameters used in the project. When looking for a specific value, you can add a layer or node in your project, set the parameter in the UI and save the project. Following the save operation, you can then open the*.xstagefile in your text editor and look at all the provided values.
# Sample Scripts
Before we get started, below are some of reference material. You should save the code to a .js file with the specified name.
Create_Drawing_Nodes.js :
| |
Create_Drawing_Nodes-Composite-Validation.js :
| |
# Writing Your First Script
To get started do the following:
- Open a blank project
- Open the scripting workspace
- Create a new script (as described above)
- Name the new script
Create_Drawing_Nodes - Select the new script
Now we are ready to go.
Let’s create the first function.
| |
This script will work based on a selection.
We will use the selection class to grab information about the selection.
Harmony 20 Scripting Interface: selection Class Reference
We will use two functions from this class:
numberOfNodesSelected()selectedNode(int i)
Let’s implement these concepts like so:
| |
Now let’s make sure we only have one node selected. To do this we will check if selectedNodes is equal to 1 else we will return a warning with the MessageBox class.
Later you can decide to validate that the selected node is a Composite Type
| |
Make sure you save your script!
Now that we have access to the currently selected node we can affect it using the
node Class. We will use the coordX() and coordY() functions from the node class to get the X and Y positions of the node in the Node View.
well add the following code inside the for loop:
var posX = node.coordX(currentNode);
and this line:
var posY = node.coordY(currentNode);
| |
Now that we have the information of the selected node, we can create new drawing nodes and link them to your selected Composite.
One of the best way to add new nodes in using a loop. We will create a loop after the we get the coordinate information.
Add the following code:
| |
The code in context:
| |
To ADD new nodes we will use the add() function from the node class.
add (String parentGroup, String name, String type, int x, int y, int z)`
Arguments explained:
- The first argument is which group to the add the node to. For this we will need the get the group info in which your selected Composite is.
- The second argument is the name of the new node.
- The third argument is the type of node to add. (in our example well be add a drawing node
*.xstage) - The last arguments are for coordinates of where the node should be. (we will change the values based on the selected compites information)
Below is the new line to add:
| |
The line in context:
| |
Now we will add the group information.
One way to do this is by using the parentNode() function.
Edit the line we just added like so:
| |
To get the last argument about the node type we need to open the project *.xstage file. (yes this is anoying and silly)
In this file we can find lots of information about modules and general information about your scene.
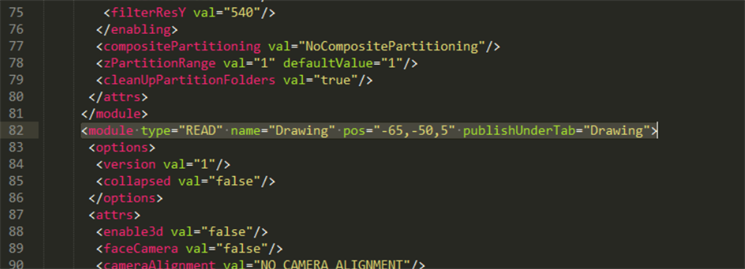
Since the backend info doesn’t always match the user interface string, it’s important to verify it. (Yes this is an oversight and shoul be fixed by toonboom… but whatever)
Edit the line like so:
| |
Add "READ" in the argument for type.
Save your script!
Below should be your script so far:
| |
Now we need to link the newly created nodes.
To do this we will use the link() function:
link (String srcNode, int srcPort, String dstNode, int dstPort)
This function takes a source node, the port number to connect from, the destination node, and which port number to connect it to.
We will add the following code below the newNode:
| |
And in context:
| |
Now we have a functional script.
Because toonboom is wierd we have to fix it’s undo system. So we should lump the entire script into a single undo step so don’t have to undo everything we did in the script. We will add the following two lines:
| |
And in context:
| |
Now remember to save the script. and test and execute it.
Challenge:
Try and add more conditional logic.
# Examples
Automating the creation of a camera move:
| |
Changing color of an element:
| |
Exporting an animation to a movie file:
| |
# Possible Tools
are we able to make it so that when the drawing layers are created they’re connected to the composite immediately?
custom toolbar?
select 2 drawing.isolate nodes create cutter/inverted cutter plug nodes into cutter name cutter: what is being cut/revealed by what is previously selected
add parent to selection -> add child to selection
I’m trying to think of ways to simplify aligning nodes like being able to select all the drawing nodes without having to draw a big long selection box over all of them to align them or something but idk how practical it’d be with pegs and stuff so maybe not
Script:
- Check that only two drawing nodes are selected
- Save the names of each node
- create a cutter
- hook up the drawing nodes respectively
- Name cutter according to nodes connected
(isolation nodes?)
| |