Houdini Fundimentals
# User Interface
Houdini’s UI can be overwhelming so let’s break it down.
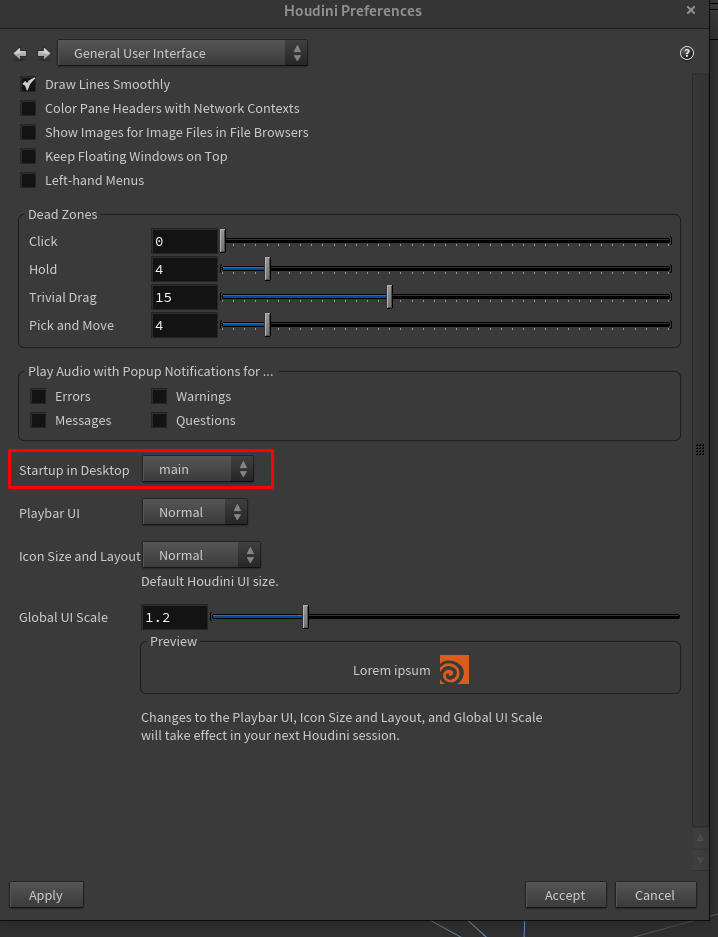
# Settings
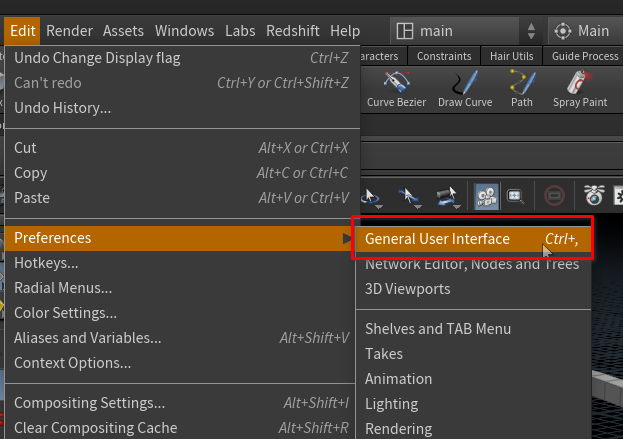
This is where a lot of the major settings are you may want to change, like UI scale.
# General UI patterns
There are some basic design patterns in houdini to lookout for.

- Tabs - this shows the active tabs and other tabs. the
+sign will let you create a new tab. - This will collapse the submenu.
- Current path - this isn’t always in every window, but often enough to be mentioned here.
- This has two buttons.
- Fullscreen current window.
- Change window type.
- This also has two buttons.
- pin current window at current path.
- change the windows path by dragging this target onto something.
In houdini your interface is split into panes. These divide your workspace. Each pane can contain multiple tabs.
As seen above, we can easily change focus and change how you are using the panes and windows.
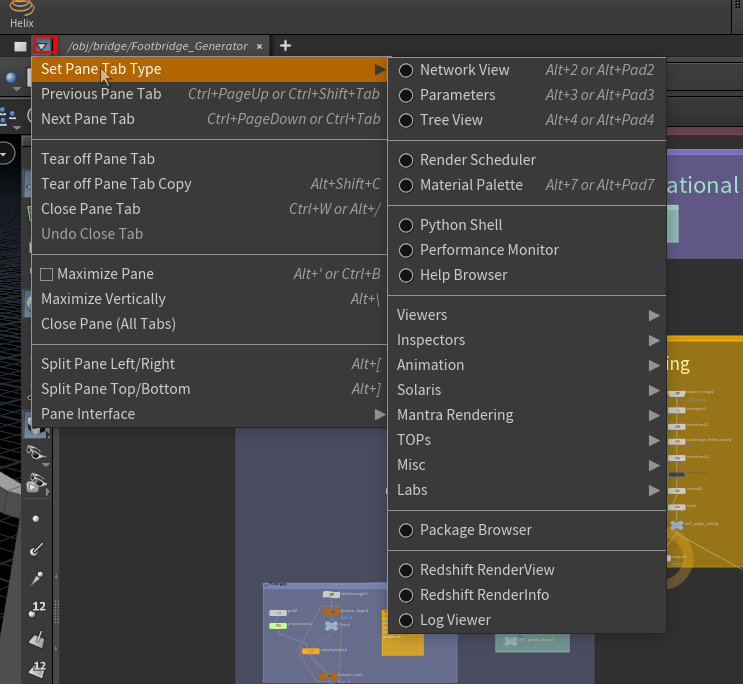
In the options on the top-right you can set the pane-type, split the pane and more.
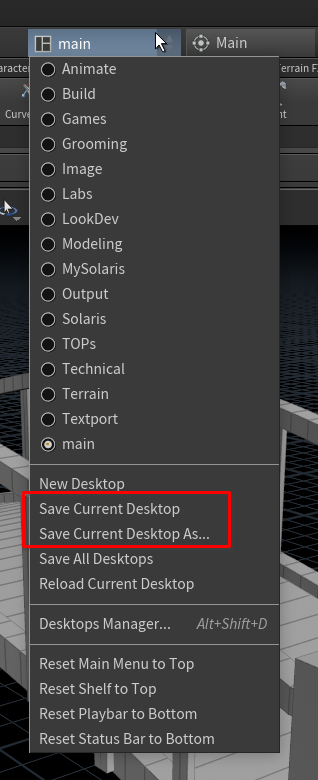
# Desktops
Once you’ve created a workspace you like you can save it and set it as a default if you want.
# 3D Viewport
Houdini’s 3D viewport is very powerful. Like other packages the main window shows the 3D view.
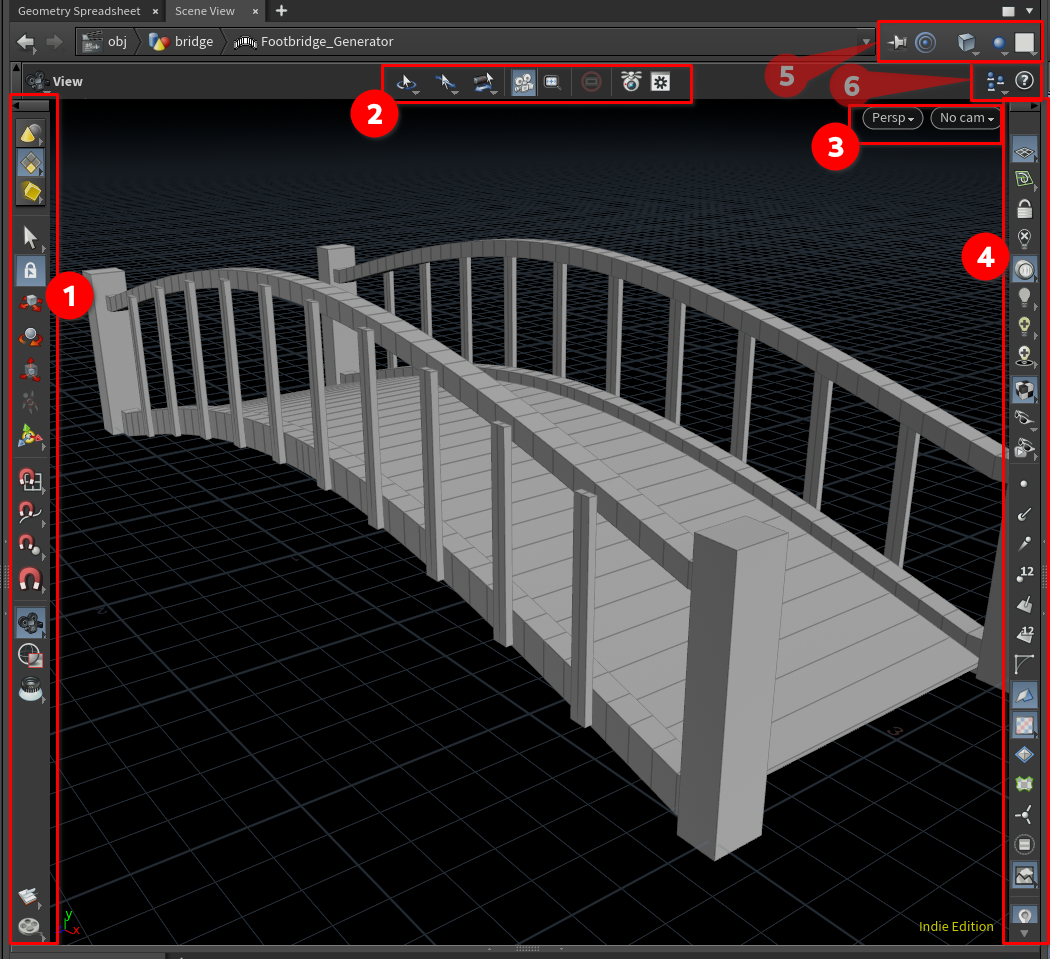
- Toolbar
- Camera options
- camera and view options - ortho is here
- View options - I’ll break this down later.
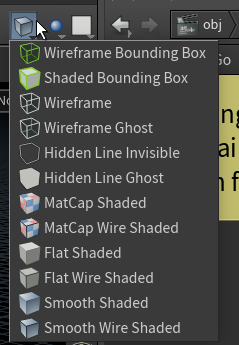
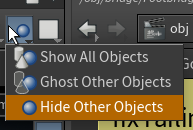
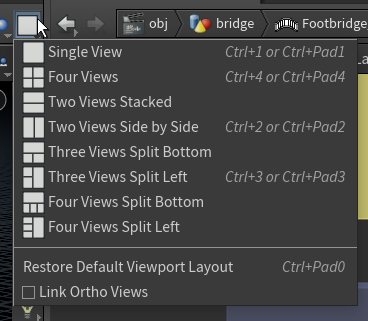
- Shading options, hiding other objects, and splitting the view
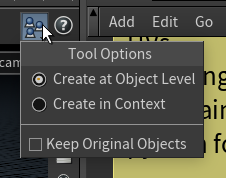
- Tool options and help
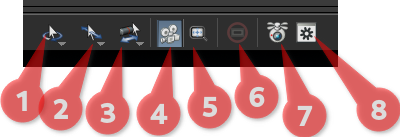
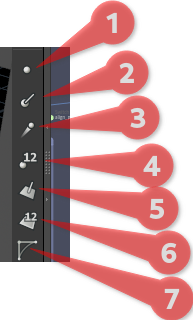
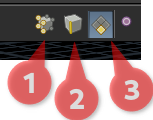
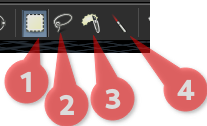
# Toolbar
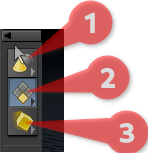
- Object select mode
- Geometry select mode
- Dynamic select mode
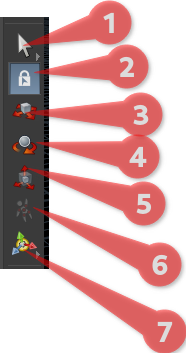
- Select
- Secure selection
~(prevents selecting geo except in the select tool) - Move
T - Rotate
R - Scale
E - Pose
Cntrl + R - Show handles
Enter
- Grid snapping
- Primitive snapping
- Point snapping
- Multi snapping
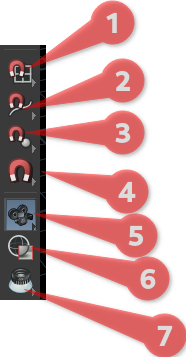
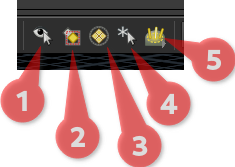
- View/camera options
- Render region
- Inspect

- Render flipbook
- Render output options
# Top bar
- Set pivot on Tumble/rotate
- Dolly along projected direction
- Zoom about mouse position
- 3D camera
- 2D zoom (this is useful for VFX)
- Reset screen window in open viewports
- First person mode
- Show/view parameters
Here you can set some specific viewport rendering and shading options and set a view:
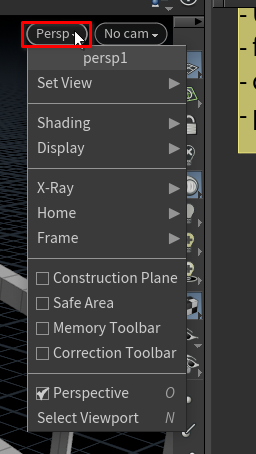
In the camera options you can look through cameras and lights:

Here you can quickly set different viewport shading options:
More view options:
Split view options:
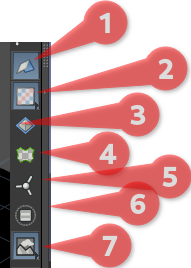
# Sidebar
This toolbar is extremely powerful and help you view your 3D data in more powerful and informative ways than most 3D apps.
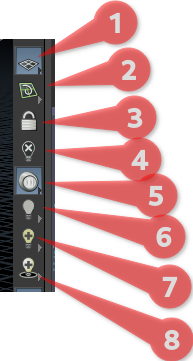
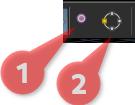
- Display reference plane
- Displace construction plane
- Lock camera/light to view
- Disable all lighting
- Headlight only
- Normal lighting
- High quality lighting
- High quality lighting with shadows
- Highlight points
- Display normals
- Display point trails
- Display point numbers
- Display primitive normals
- Display primitive numbers
- Display primitive hulls
- Tint backfacing polygons
- Show UV texture when present
- Show 3D island boundaries
- Show UV island boundaries
- Display particle origins
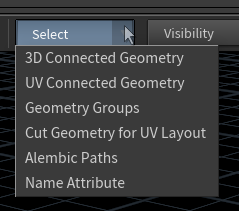
- Show group and attribute list
- Display background

- Toggle visualization (These can be setup custom or built in to show different data)
- Viewport messages
- Apply display operation across all split panes
- Open display options
D
If you right-click the display options you can open up color correction. This is how you can check if ACES or other color correction is set up right.
# Navigation and hotkeys
#hotkeys
Houdini uses ALT navigation.
ALT+LMB/MMB/RMB=> rotate / pan / zoom (it can be locked to not have to use alt)- Frame selected from home view =>
SPACE+G - Perspective view =>
SPACE+1 - Top/bottom view =>
SPACE+2(hit 2 more to toggle between bottom and top) - Front/back =>
SPACE+3 - Left/Right =>
SPACE+4 - UV vierw =>
SPACE+5 - Focus on selection =>
F - get back to home view =>
SPACE+H
# 3D Selection (edit mode)
When in geometry selection mode there are hints at the bottom of the viewport.

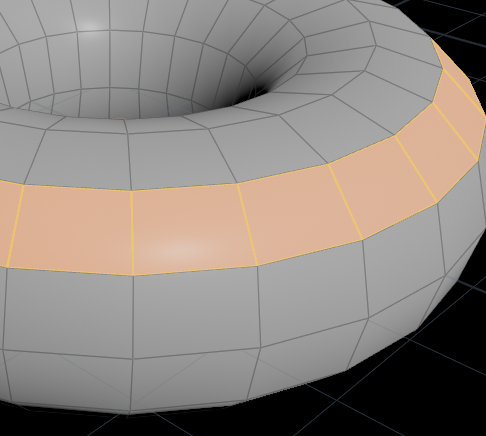
- Points
- Edges
- Prims
Hit 2 / 3 / 4 to toggle between selecting points/edges/primitives.
This is similar to blender
- Verticies
- Breakpoints
Houdini exposes 3d architecture unlike many other programs. Points and vertices are actually different types of data but related. Verts are corners, points are the whole thing. This is how you can fill a primitive with color completely and not bleed to the next one.
- Box select
- Lasso select
- Brush select
- Laser select
- Select visible only (camera selection)
- Select fully contained geo only
- Select groups or connected geo
- Select whole geo
- Select by normal
Use these tools to navigate and edit and move your geo around.
All these options are context dependent so if you are not in an Geo container then they wont show up.
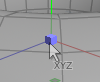
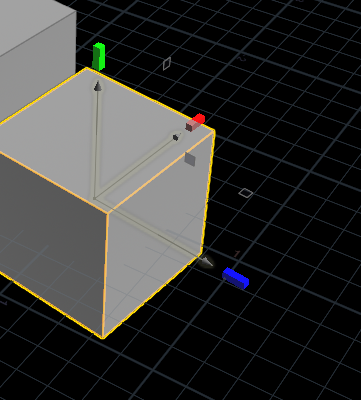
# Object mode
This is where you can manipulate whole object similar to other 3D apps.
Many of the same transformation options are used here.
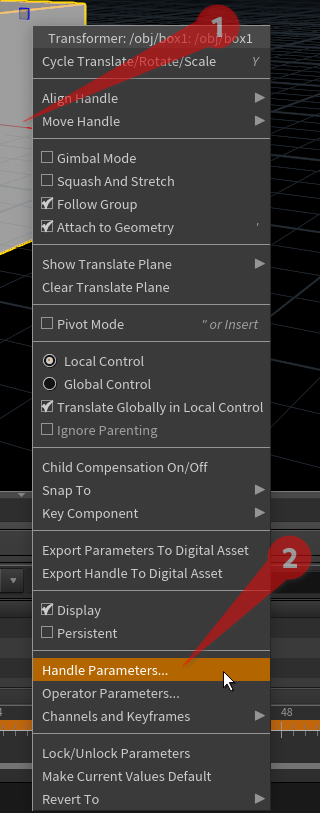
One thing I find I use frequently are the gizmo options.
If you Right click on the center of the gizmo you will get a bunch of options.

I frequently use the align handle options to move things in the world easier.
Holding down SHIFT will toggle fine tune mode for any action.
Holding down CNTRL will toggle snapping, (Usually grid snapping, but this can be changed)
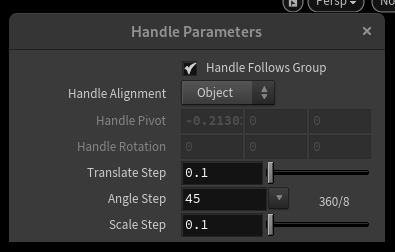
To change the snapping increments of the handle tool right click on the handle and open the handle parameters
Middle mouse click can be set up to speed up your workflow.
I change the behavior to be more like blender. In that you middle mouse click and drag and snap to an axis you drag in.
Construction planes can be used for extra reference in setting things up. By default the middle mouse drag will constrain to a construction plane. You just need to add one.
# Handle Tool
Different tools have different handles and you can define your own handles in python.
For example the transform tools have handles that you probably recognize, the camera has different types of handles to change different parameters.
# Radial Menus
Radial menus can be used in the viewport and network view.
These can be customized and set per what you need.
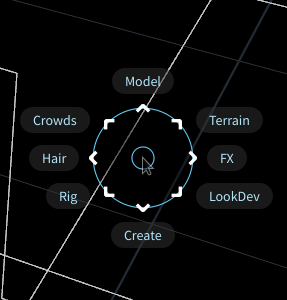
In the viewport you tap C to bring up the menu.
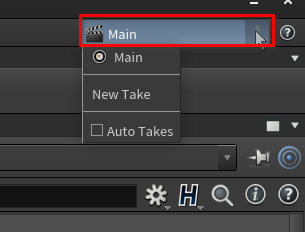
# Takes
Takes can be used to store different settings. For example, high quality render settings for a final take.
# Transforming and Objects Pivot
There are many ways to do this.
- Pivot mode =>
insert
This behaves a lot like maya
You can also change the pivot in the parameter view.
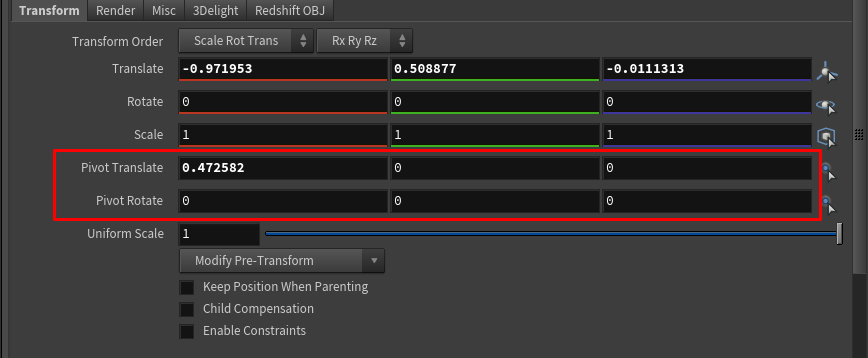
You can do some operations like freezing transforms and things like that in the parameter window as well.
![]()
This has to do with pre transforms well cover more of this later.
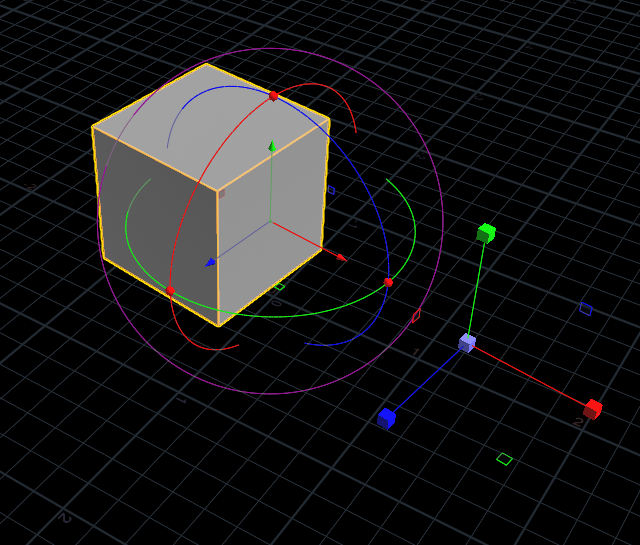
# Detaching Handles
Detaching handles can help you work in a similar way to using the 3d cursor in blender. Its a temporary way to create a different reference point to do your manipulation.
- Detatch Handle =>
'apostrophe
You can also detach it in the right click menu of the handle
You can make the detached handle persistent in the right click menu and use both.
You can then select snap to centroid or pivot in the right click menu to put it back.
You can also change the orientation of the handle
# Transforming Multiple Objects
If you select multiple objects you then need to use the transform, scale or rotate tools to change them all.
In the right click menu you can tell it to change all at once or each individually.
# Matching Transforms
In houdini you can quickly match transforms. Click on the buttons indicated below then click the target object and it will match.
![]()
# Align state and Orientation picking
This is great tool to help you align and orient objects to other objects in your scene.
There are two ways to get to Orientation picking.
- Right click the handle and choose it:
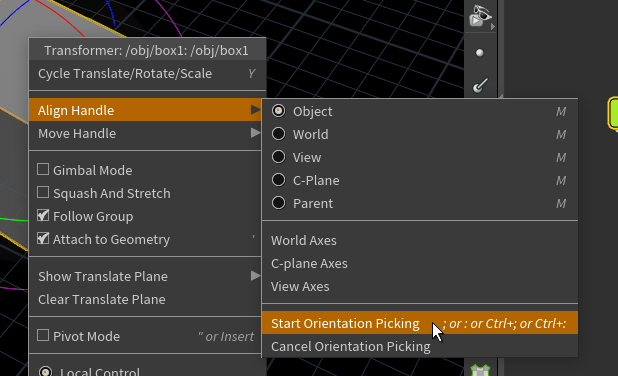
- Press the
;to start orientation picking.
Then the handles should like this:
If you hold shift while you click on another objects component then it will align and not move. Always check the hints at the bottom of the viewport.

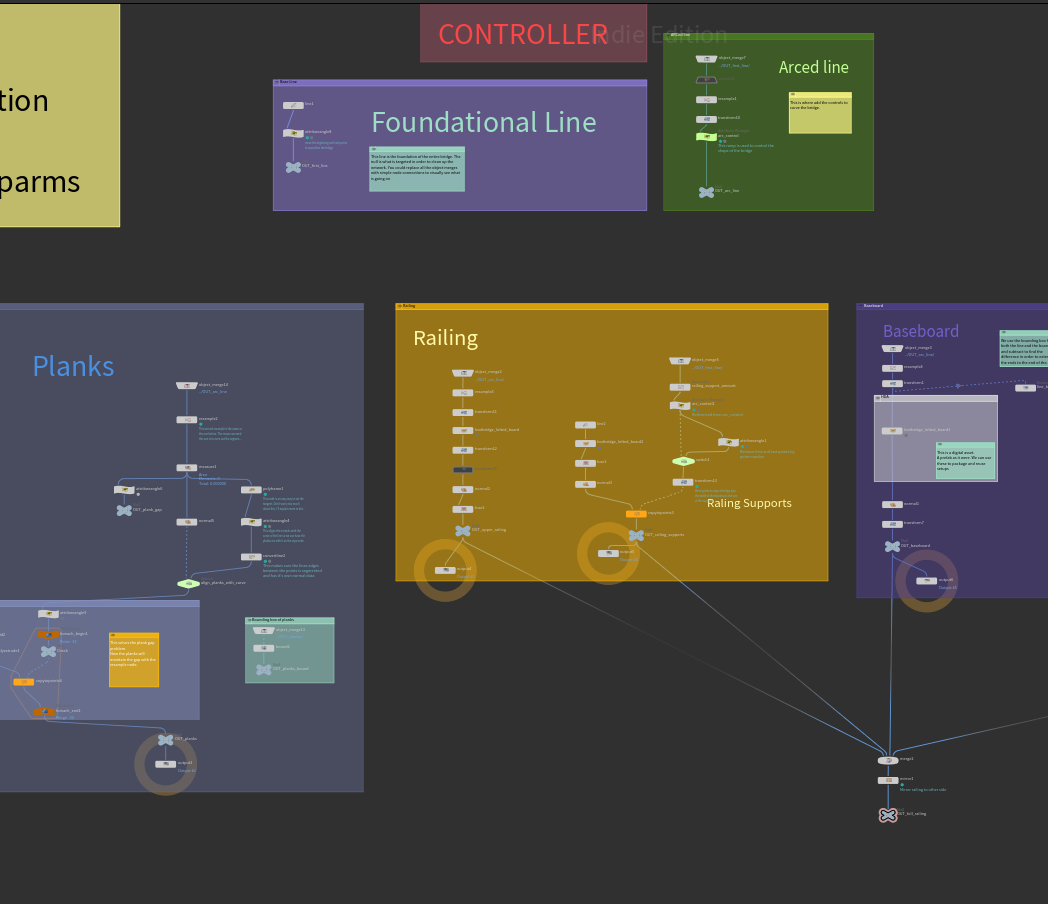
# Network View
The network view is the heart of houdini. This is where the magic happens. This is where you can see your node network.
A lot of the same #hotkeys are used in the network to move around:
- frame selected =>
F - get to home =>
H