Shading and Rendering in Blender
# Rendering
# What is Rendering?
Rendering in the context of computer graphics usually refers to the process of taking some type of data and turning it into a final image. This is accomplished using a large and complex stack of tools and software and hardware.
The term rendering was taken from traditional art as a way to describe what the computers are doing. Namely creating images.
# What are Renderers?
Renderers are software stacks to do the hard work of taking many types of data and turning that data into an image. Often making use of research in many different fields, from physics, to material science and applied in computer science. For example, most renderers try to approximate how physical light bounces of certain materials and how our eyes interpret that light.
# Types of Renderers
There are many types of renderers, but in general we can lump them into two categories
- Path-tracers
- Rasterizers To quickly differenciate them think of path-tracers as the type of renderer that Pixar uses and Rasterizers the renderer that game engines use.
# Path-Tracers
Path-tracers are generally trying to do things as accurately and with as much quality as possible, at the expense of speed.
You could never play a game with renderman
The reason for this is that one of the foundational techniques they use is ray-tracing. This involves simulating how millions of photons bounce around the scene and react with different materials.
Because of this straightforward approach to rendering it is often paradoxically simpler to get a scene to look the way you want than with raster-engines
# Rasterizers or Raster-Engines
Raster renderers are the flipside of path-tracers. Instead of accuracy they prioritize speed. This is because these engines are usually used for things like games where you want to render 60 frames-per-second on top of your game logic and everything else happening. These days raster engines are approaching the quality of path-tracers of the past and are used even in some contexts for film.
They are especially used for previs and lookdev in film.
# Rendering in Blender
# Set up
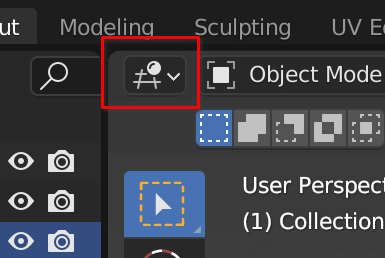
# Node Wrangler Addon
![]()
I recommend enabling the Node Wrangler addon in your preferences.
Node Wrangler comes shipped with Blender
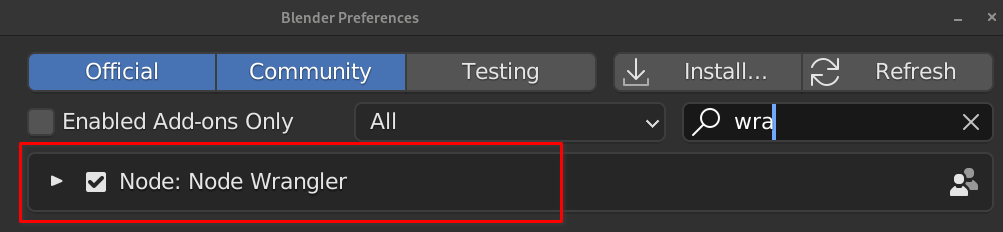
Most addons have extra options if you expand the window. And have a link to their documentation.
Node Wrangler — Blender Manual
# Renderers in Blender
Blender ships with two render engines.
- Cycles
- Eevee
Cycles is a classic path-tracing render engine, while eevee is a raster-engine.
There are third party render engines you can install if you want to. These have varying amounts of compatibility.
- Redshift
- Octane
- LuxCoreRender
- Radeon ProRender
- Malt/Beer
- RenderMan
- Chaos V-Ray
- Nvidia Omniverse
# Cycles
Cycles is a path-tracing render engine. It will take more CPU and GPU power to get a nice image, but that’s not a bug, that’s a feature. Path-tracers are designed to efficiently use as many resources on your computer as possible for the render.
# Setting up Cycles
- Go to the render settings tab in the properties window and in the Render engine drop-down select Cycles
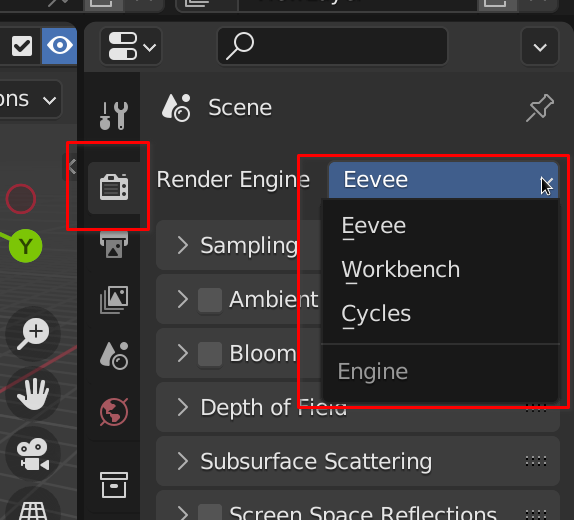
- Optional in the render settings tab you can then choose to use GPU or CPU. If you have a good enough GPU you should always use GPU.
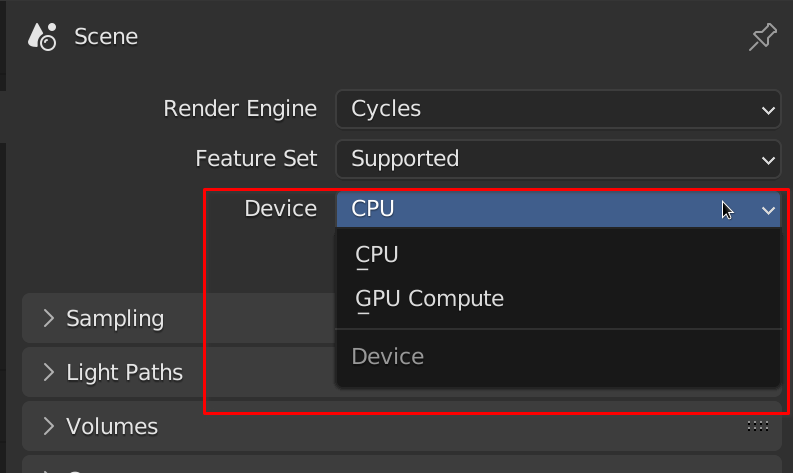
- You will probably also have to set up how you want cycles to use the GPU.
- Open the blender preferences window (In the edit menu) and open the system menu
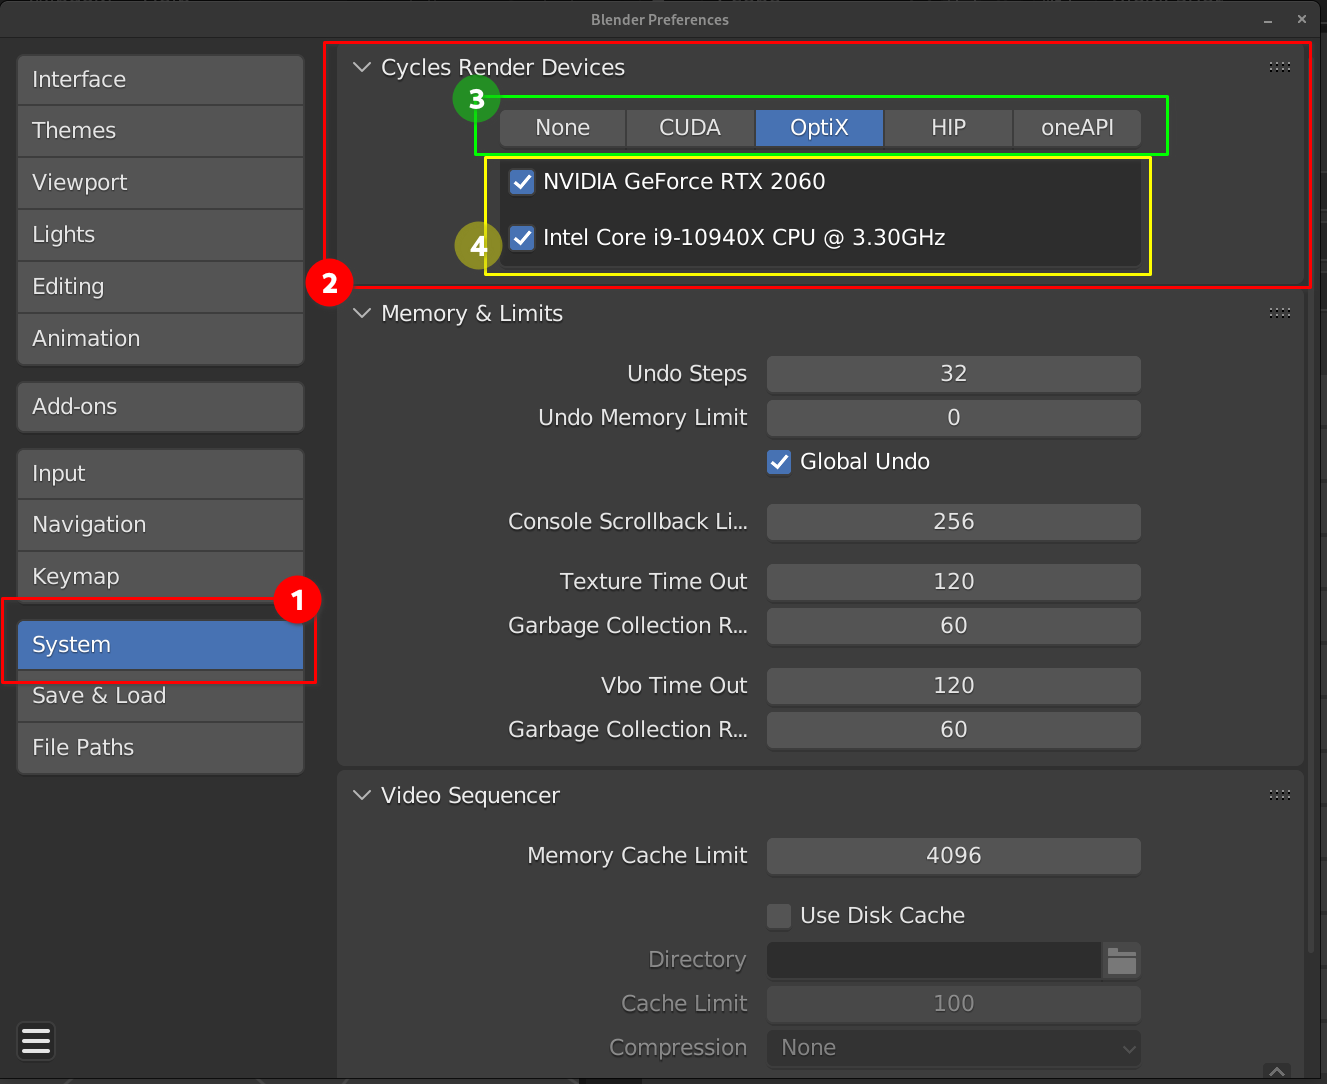
- System menu
- Cycles render devices section
- Ways to integrate the GPU with the CPU
- Your systems hardware that can be used for rendering. Typically your CPU and GPU(s)
- Then select a compatible method to use your GPU with. CUDA and OptiX are the most common especially with Nvidia GPUs
- Open the blender preferences window (In the edit menu) and open the system menu
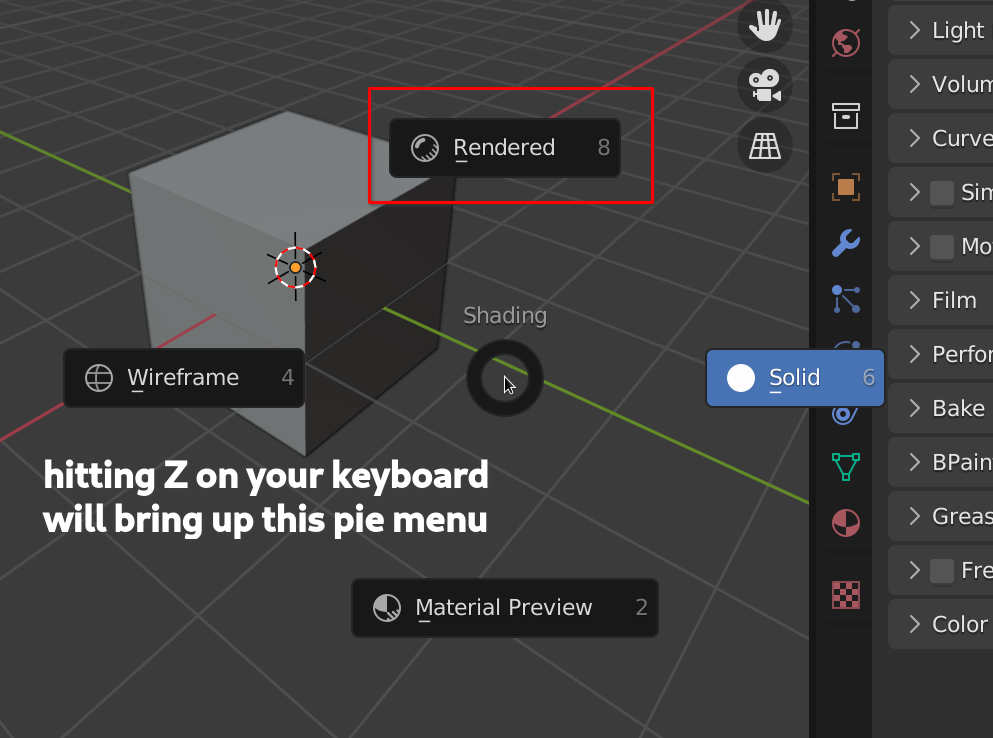
- Now if you switch to shaded mode in your viewport it will use Cycles instead of workbench or eevee.
- You will probably also have to set up how you want cycles to use the GPU.
# Eevee
Eevee is a raster-engine build into blender. It can get you much faster results and has almost complete feature parity with cycles. This means you can use the same material for cycles and eevee!
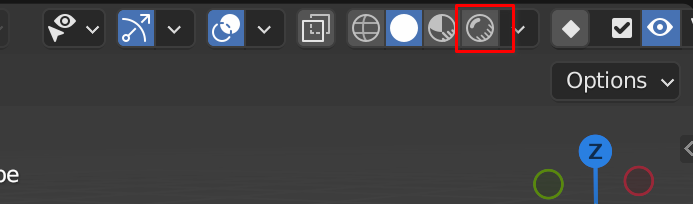
The Material Preview view-mode (also known as the lookdev mode) always uses Eevee.
This is because it’s faster and uses less computer resources and so it’s easier to iterate through your surfacing.
# Setting up Eevee
Setting up eevee is pretty much the same as cycles. You probably won’t need to actually do anything because Eevee is set by default. But if not, in your render settings just choose eevee.
# Eevee settings
Because eevee is a raster engine there are settings we need to tweak for different results. Basically the same as a game engine renderer.
![]()

As you can see there are a lot of setting to change above.
# Shading
Shading refers the way software and artists define how the surfaces should react to light and shadow. In the context of 3D we do that with shaders and materials and lights. This whole process can be extremely complex, so we will only cover the basics here.
# Important Terminology
- Shading -> How surfaces react to light
- Shaders
- Technical Definition -> Code that executes on a GPU. (This is a more correct definition)
- General Definition in the context of this lesson -> A way to define the behavior of a surface in our scene.
# Set up Workspace for Shading
Open the shading workspace or follow the steps below.
- Split your 3D viewport window.
- Hover over the borders between the windows until your cursor turns into a double-sided arrow then right click and choose to split the window.
- Or, hover the cursor right next to the border of the window until your cursor turns into a plus symbol.

- On the new window you just created click on the window-type dropdown
- Then choose shader editor. Your windows could look something like this
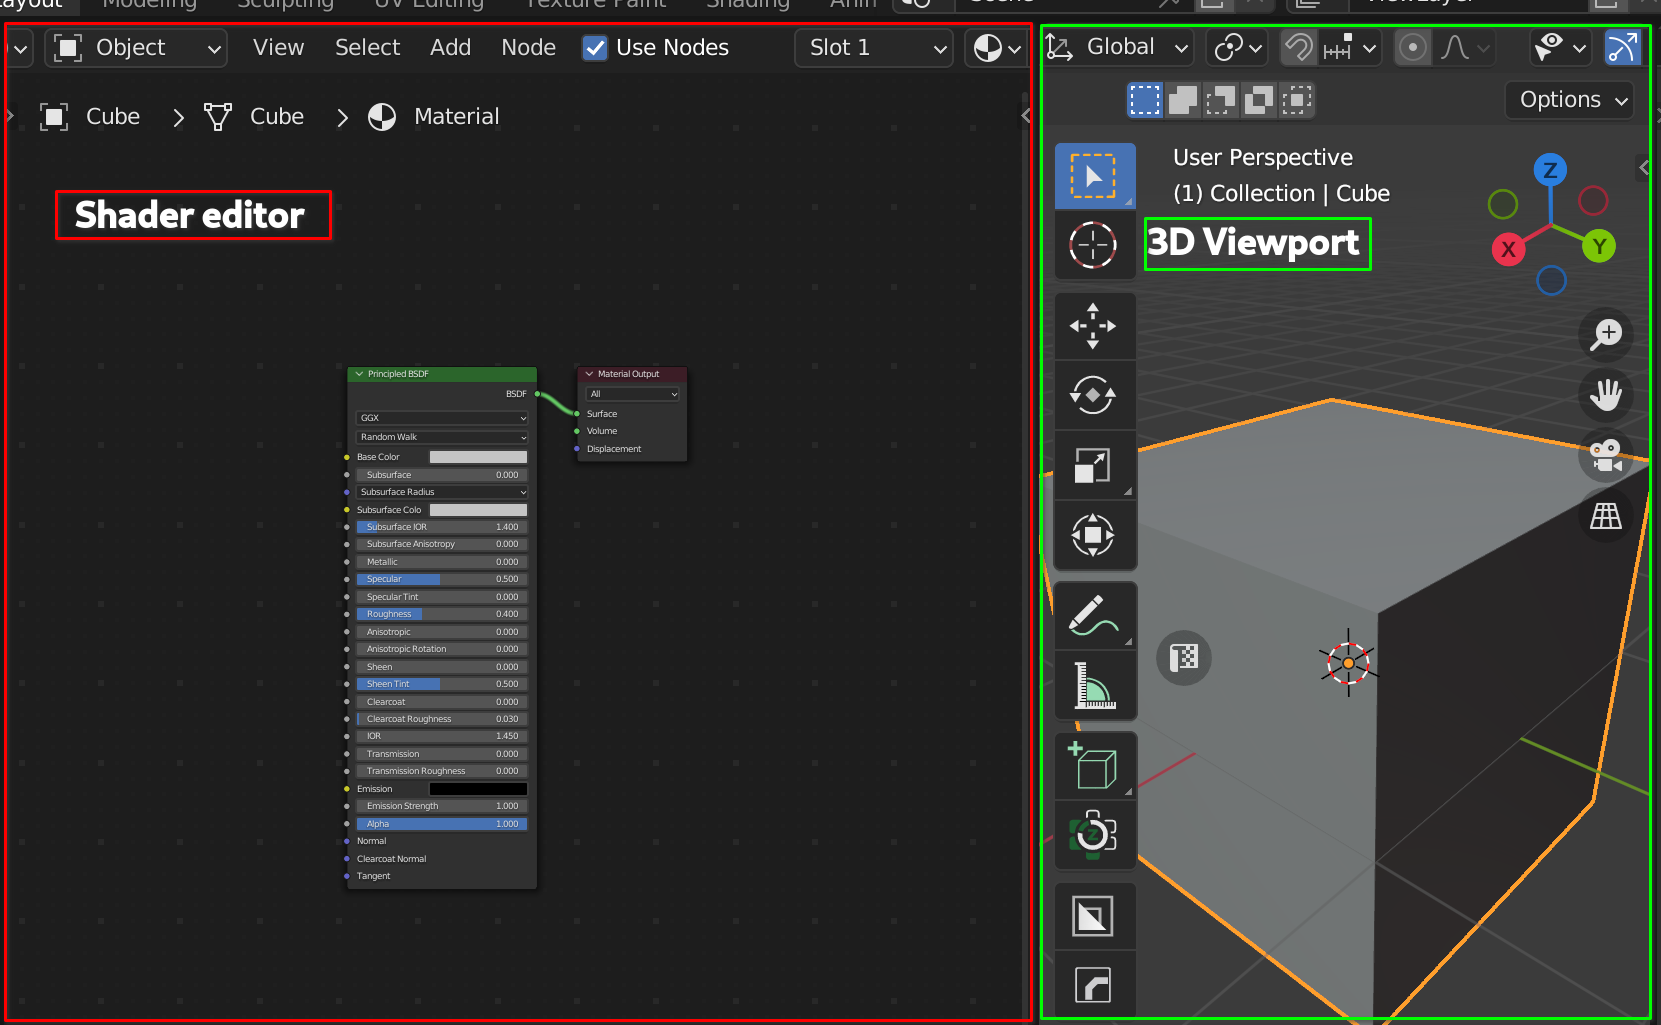
Now that you have the workspace set up we can start with some basics.
The two operations you will use the most are:
- Render Image
- Render Animation
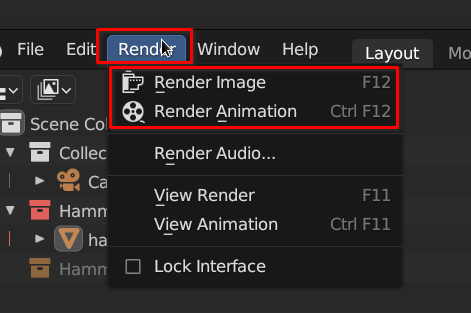
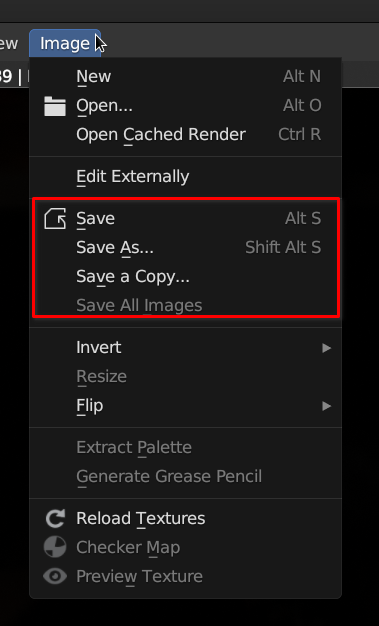
Once you render an image a separate image viewer will pop up. To save that image use the image menu option and save the image where you want it.
For rendering an animation there are some important things to know and remember.
![]()
Animations are ALWAYS rendered as image sequences. This means that a list of images is saved out. You can then import this list into a video program or back into blender to composite and render as a video.
I talked about file management before, Well this is important here too. Ideally you have a folder for this project and folder in that project just for your renders. You may even want separate folders per shot if they are animations.
The settings for this are in the Output Properties tab in the outliner.
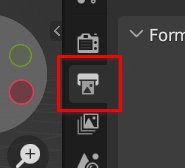
In this panel you can set the size of the images and the location for them to be saved out to.
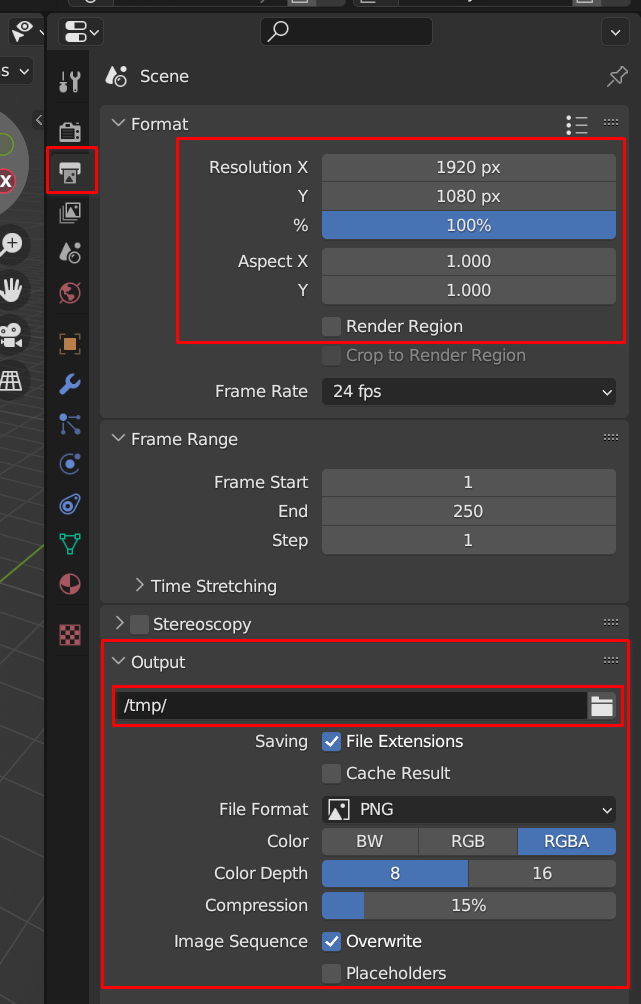
If you don’t set the output directory all the rendered images will go to the temp directory on your machine where many people just loose them.
File format is also important.
EXR files are the industry standard for film and animation
If you are on a professional project or want to practice with industry standards then always render out EXR files.
They have many advantages.
- Uncompressed
- Can be layered
- Have floating point data, which means they can store higher fidelity and fine details in an image
However, if you are doing some test renders then PNG or jpeg is fine.