Post Production Exercise
# What to Turn In?
- Blender Section
- Screenshot of blender compositor node tree
- exported composited image
- Resolve Section
- Screenshot of fusion node tree
- Screenshot of resolve color section
- Screenshot of final image
# How to complete this assignment
Watch The Videos Below!
Blender Render Layers and Changing Lighting
Resolve and Fusion Walkthrouhg
For color-management see Color Management Hub ...Color Management Hub
# Blender
I have two EXR files for blender.
# First File
- Download the EXR file
- Import the EXR to Blender
- Do some color correction
- Add bloom
- change the hue of an object with cryptomattes
- Screenshot node graph
- Save final image as PNG
# Second File
- Download second EXR file
- Import EXR into the blender compositor
- Duplicate the render layers node 3 times
- Follow the video on how to change each lights color
- Take screenshots of your node graph
- Save final image as PNG
# Resolve
You only need to use the first file for fusion, not the color change file.
# First File
- Import the EXR file into Resolve
- Create a new clip
- Switch to Fusion
- Do some color correction
- Add a glow
- Switch to the color workspace
- Play with the color correction
# Lesson Notes
# How How To Complete
# Blender compositing setup
There are few ways to set up blender for compositing.
The easiest is simply click on the compositing workspace at the top of the interface.

Then make sure use nodes is turned on.
By default there won’t be anything there because Blender’s default behavior is to use the rendered image as the input. But that’s not the only way.
We can also Drag and drop an image into the compositor. Or create Image node and open the desired file.
For this exercise I am providing you a pre-rendered file so you will use the later method.
The next thing I do is split the pane and make the other pane and turn that one into an Image Editor panel.
Make sure you have Node Wrangler enabled
In the compositing window you can now view your composite two ways.
- By plugging the wires into the Composite node.
- Creating a Viewer node. For this you can use Shift+Cntrl and click the node you want to view and it will automatically create it if you have node-wrangler enabled.
Then in your Image Editor window change the image from Render Result to Viewer Node
This way your preview will always show up in that window.
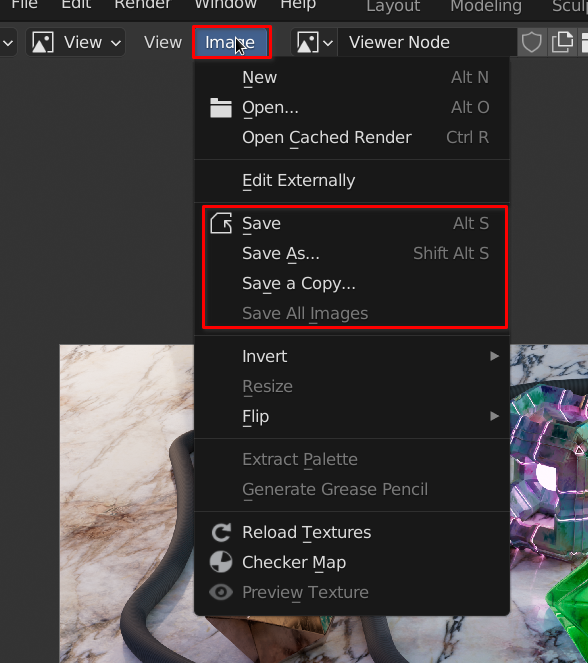
To save the final image click the Image menu in the Image Editor window and click Save As
# Render Layers vs Render Passes
# Render Passes
Render passes are setup in the renderpass settings. Many renderers have useful passes available for you to use with a click of a button.
In Blender the settings are in View Layer Properties.
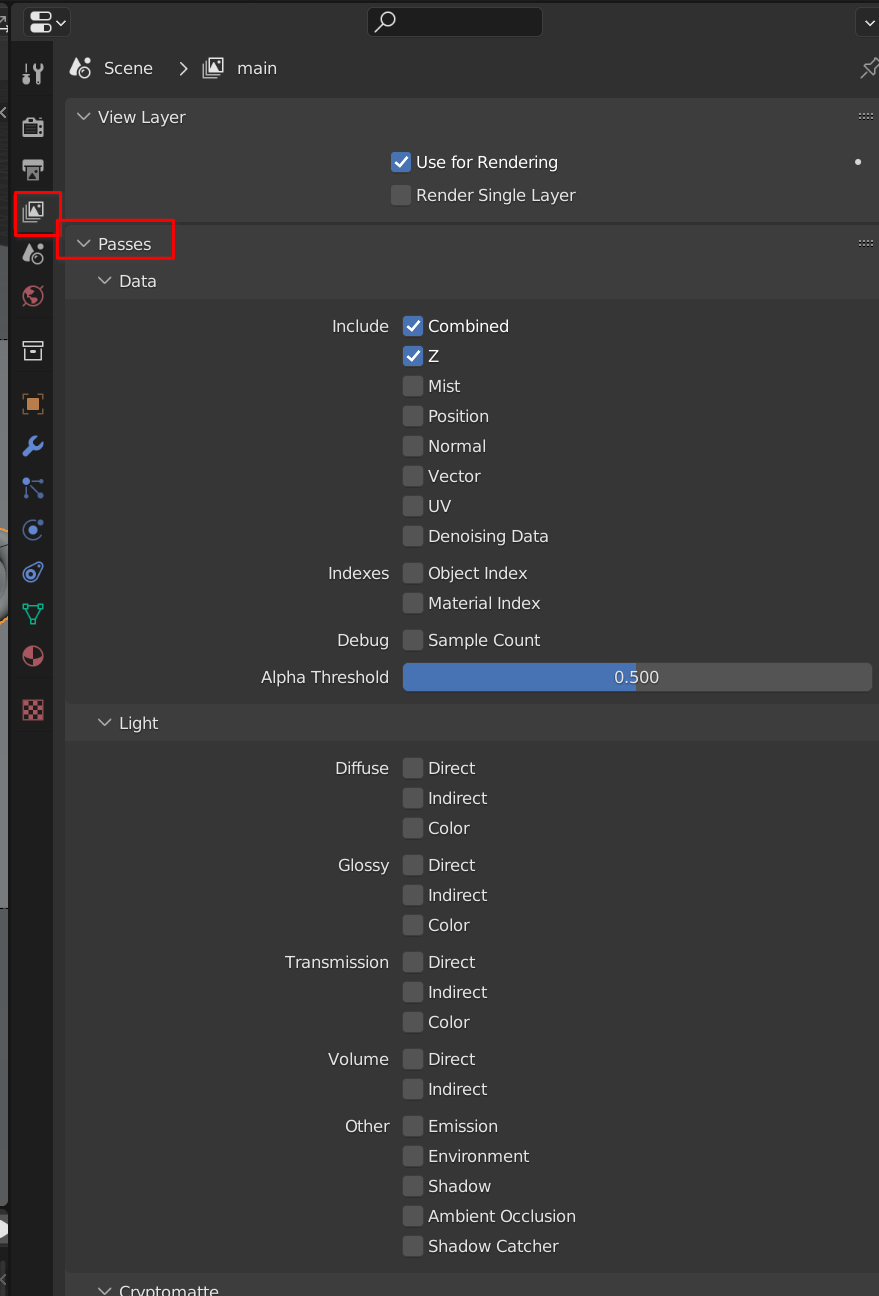
You can toggle these on and off depending on your compositing needs.
# AOVs
In other software all renderpasses are referred to as AOVs.
AOV stands for => Arbitrary Output Variables
In blender we can add custom AOVs per shader in our shader graph.
I’ll add info on this later, but you don’t need to know it now.
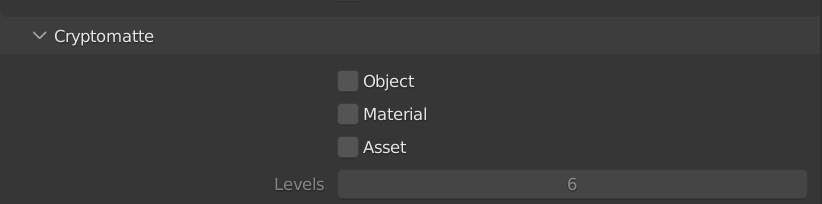
# Cryptomattes
Cryptomattes are very useful passes that create keys per material, object, or something else you define so you can easily mask out objects in post.
# Render layers
In order to create render layers we have to understand collections and do some set up. Render layers can help us save time later by separating out our render into multiple renders that we can use in the compositor later. One example might be to recolor lights in post.
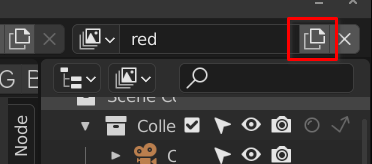
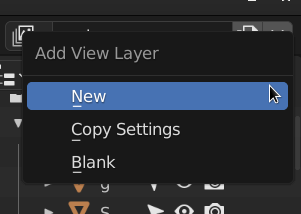
In order to setup render layers we have to create new view layers. You can find these in the upper right corner of your interface.
Clicking the file button will show you the option to create a new view layer
You may also want to turn a few things on in your outliner.
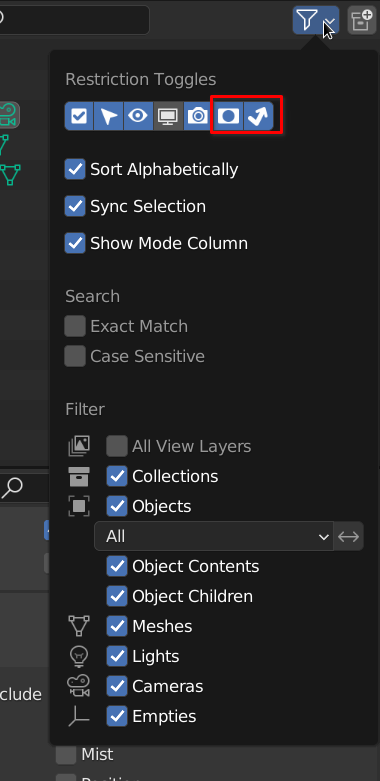
This adds two new options to collections.
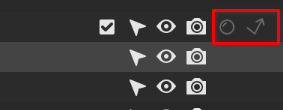
The first is a mask. This means that it will mask any other view layers and create transparency on that layer. useful for separating out objects in your renders.
The second is for bounce light only. This means that the object will be invisible but the bounce light will effect the scene.
A simple use for view layers would be to separate out the main lights.
First:
Create a new view layer.
Second:
Disable the all but one light.
Make sure each light is in it’s own collection.
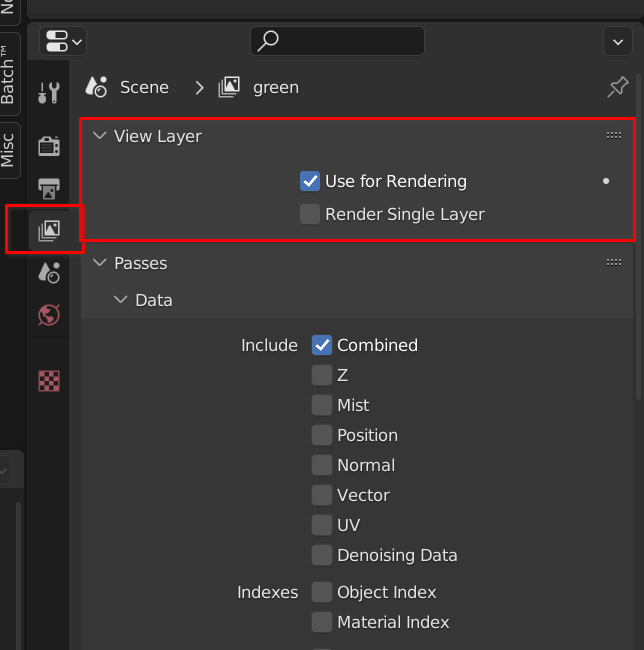
In View Layer Properties, make sure you DON’T have Render Single Layer checked or you won’t render all the layers at once.
# Other Tips
# Viewport Renderpasses
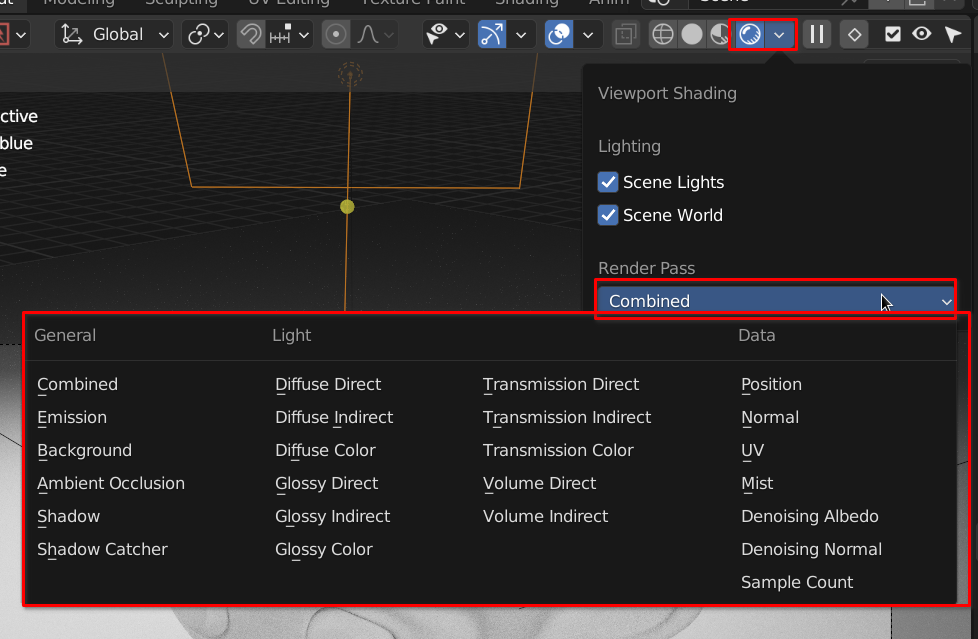
To see render passes in your viewport, make sure you are in rendered mode and then open the view drop-down and you’ll see a Render Pass option.
# General Compositing in Blender
The Blender compositor is relatively powerful and simple compared to industry standard compositors like Nuke and Fusion. So we’ll start by learning our way around it first.
To get started you want to setup your workspace a bit. See .
# Image Source
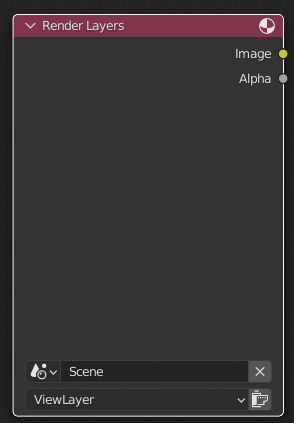
By default blender will use the Render layers node as the incoming source. This may or may not be what you need. This node will grab the image or image sequence that was just rendered and use that as the incoming image.
You may also use an Image node.
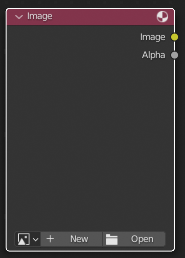
Here you can ether use an image already loaded in your project or open a new one.
On large projects, project management is very important.
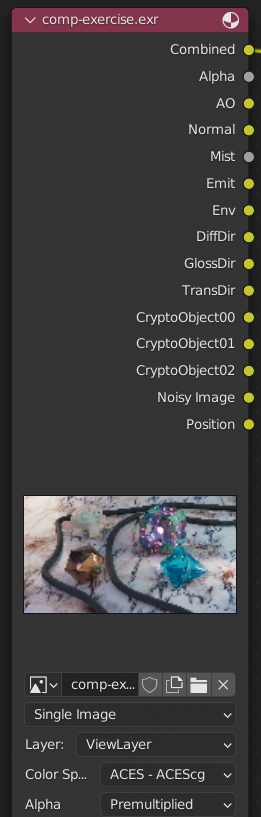
Above is an example of a Multilayer EXR loaded in the image node.
# Exporting Files
One of the main beginner questions is how to export or save images or sequences. I’ve seen it many times where people just re-render their stuff. This is unnecessary.
The easiest way is using the Image Editor image menu.
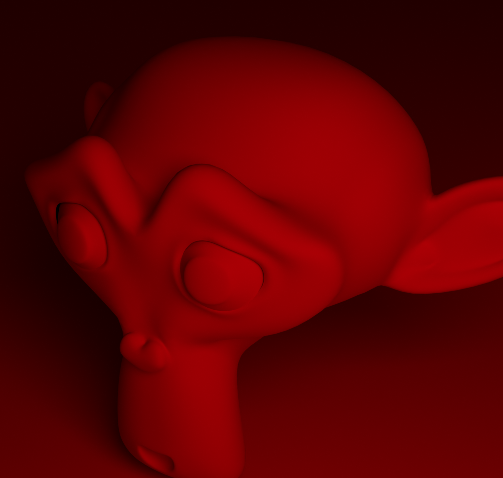
# Changing Light Colors In Post
There are so many things you can do with post-production. In CG it can really help us save time especially in a production environment.
Before jumping into the compositing please at least read through how to set up the render for this to work.
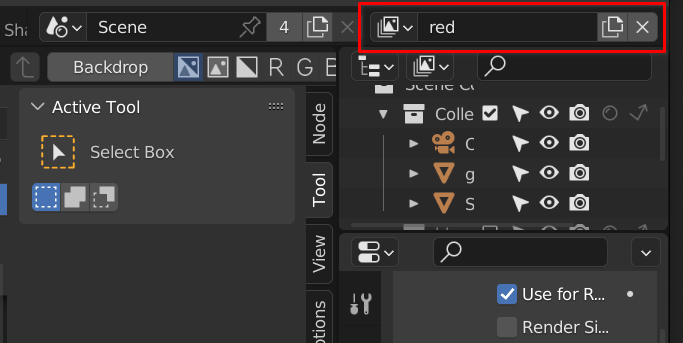
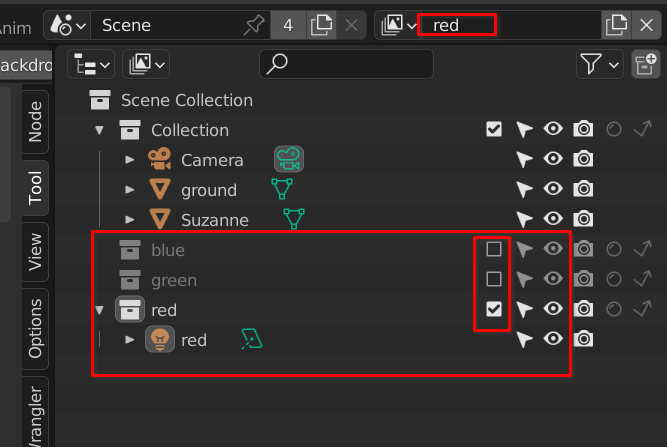
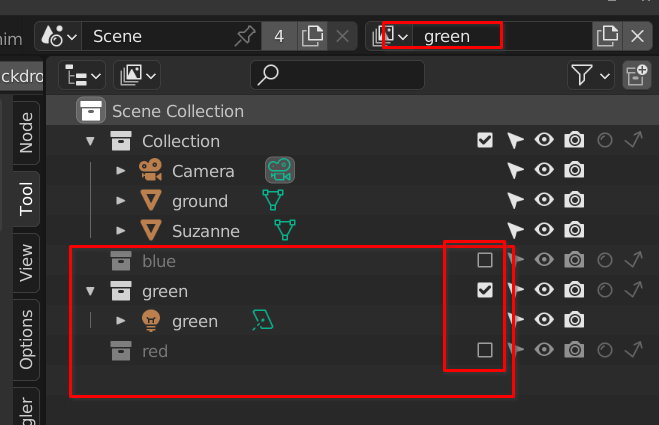
In this exercise each of the three lights is on it’s own render layer. This allows us to use some simple compositing tricks to re-light our scene.
First, drop-down three Image nodes and load the same EXR into each one.
You should notice a layer section at the bottom of the node once it’s loaded.
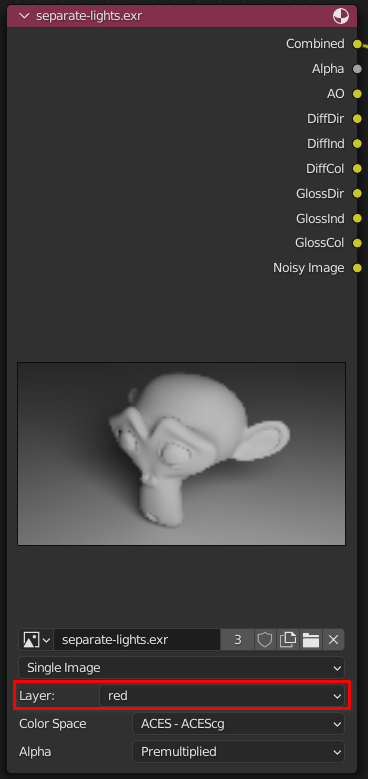
Set each one to a different layer.
In our case it should be:
- red
- blue
- green
Then do the following after each node:
- Add an RGB node
- Add a Mix node
- Set it to Multiply
- Connect the Image and RGB nodes to Image inputs of the Mix node.
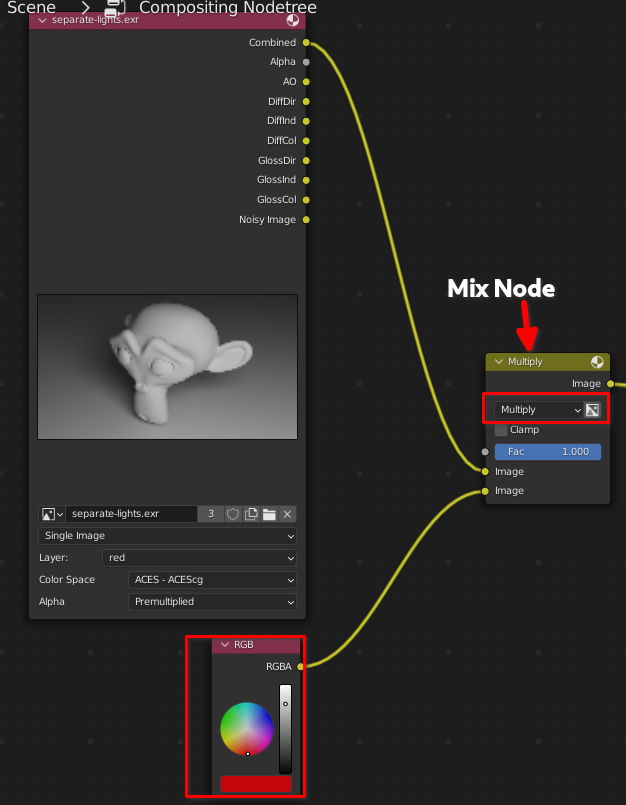
Once you’ve done that your setup should look something like this:
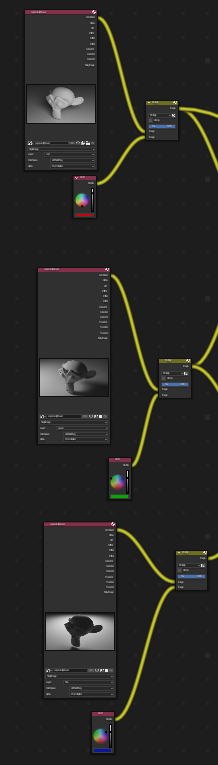
Now you can change the color of each light separately.
But we are not done yet.
Next we need to drop down three more mix RGB nodes and switch both to Add.
Then connect them up like so:
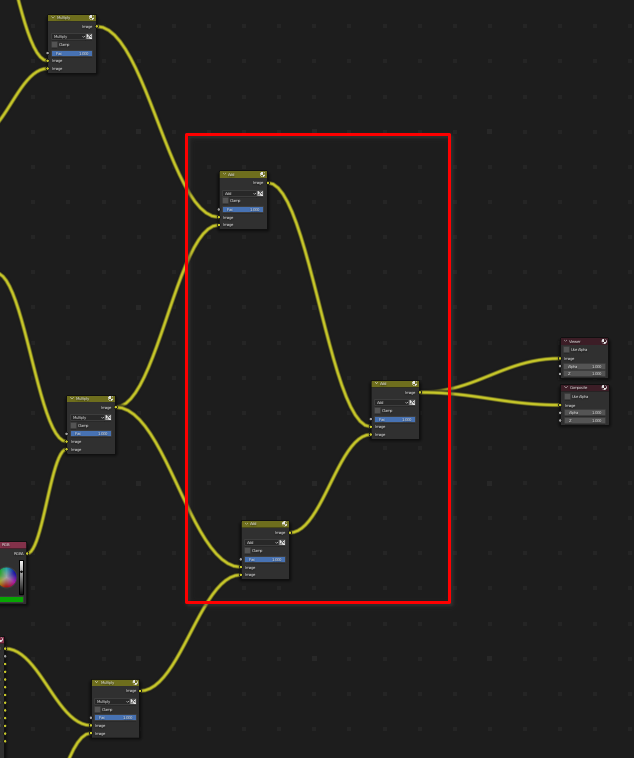
We use Add for these nodes because it works best with combining lights.
At this point we can recolor all the lights separately in post without having to re-render.
# Setting up fusion
#fusion
First, download Davinci Resolve from here.
Once you have it installed open it. You’ll be greeted with a window like this:

Then, open a new project. Once Resolve opens at the bottom of the window you’ll a set of icons.

These are the different “apps” or Contexts you can use in Resolve.
# Importing Media into Resolve
The simplest way to add files to a project is change to the Media context and simply drag and drop files here.
# Creating a new clip
In resolve we need to create clips in order to process anything.
The easiest way to do this is to switch to the Cut context and then drag our file down to the timeline. This will automatically create a clip.
# Opening Fusion
Once we have a clip we can switch to the fusion context. It will automatically create a fusion clip based on whatever the playhead over.
playhead
Once Fusion is open we should see something like this:

- Preview window A
- Preview window B
- Inspector
- Node editor
The purpose of the two preview windows is you can see before and after. on whatever you are doing. This can really help improve your workflow.
To toggle the preview windows you can do two things.
- click on one of the two dots on any node and it will enable the preview on the respective windows.
- Click 1 or 2 when you have any node selected and it will toggle the respective dots.
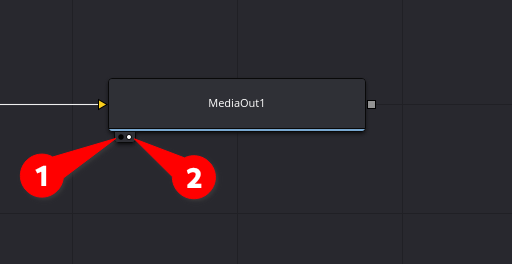
The inspector will show the options for any node that is currently selected.
# Navigating the node editor
# Adding Nodes
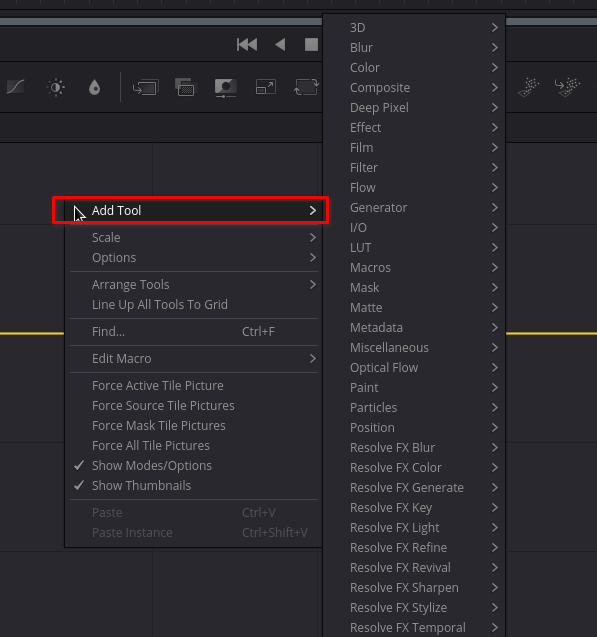
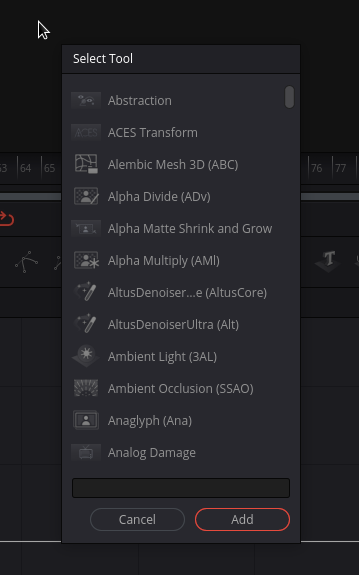
To add nodes you can do two things.
- Right click in the node editor and select Add tool
- Click Shift+Space and a search box will pop up in which you can start to type and the list will update in real-time. You can also use the arrow keys to navigate up and down the list then press enter to drop-down the node you want.
In Fusion your nodes can go in any direction. This is very similar to how Nuke lets you layout your nodes.

# Anatomy of a Fusion node
How inputs work in Fusion - YouTube
Inputs => Triangles Outputs => Squares
Think of the colors as category of input.
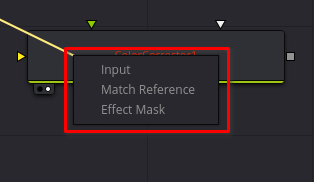
Yellow => Main input Green => Secondary input Blue => Effect Mask White => anything else
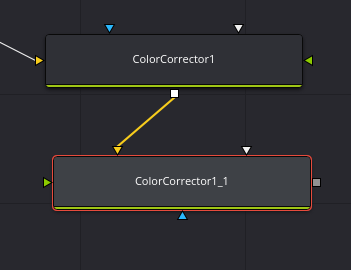
Color Corrector Node Example:
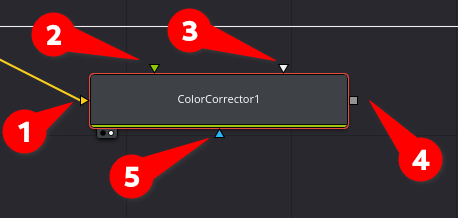
- Main Input
- Secondary Input (Match Reference)
- Match Mask input
- Output
- Effect Mask
# Connecting Nodes
There are few ways to connect nodes in fusion.
- Click and drag from one output then:
- Drop it onto another node. By default it will connect to the next open input.
- Drop it directly onto an input of one of the nodes.
- Right-click and drag from an output onto another node. A menu will pop up and let you choose which input to use.
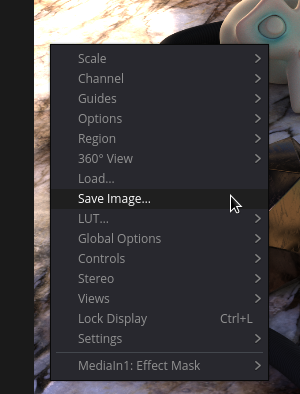
# Saving Images
You can right click on the preview pane and save the image.
# Color Correction in Resolve
Davinci Resolve is industry standard in color grading for film. It even has it’s own context for it.
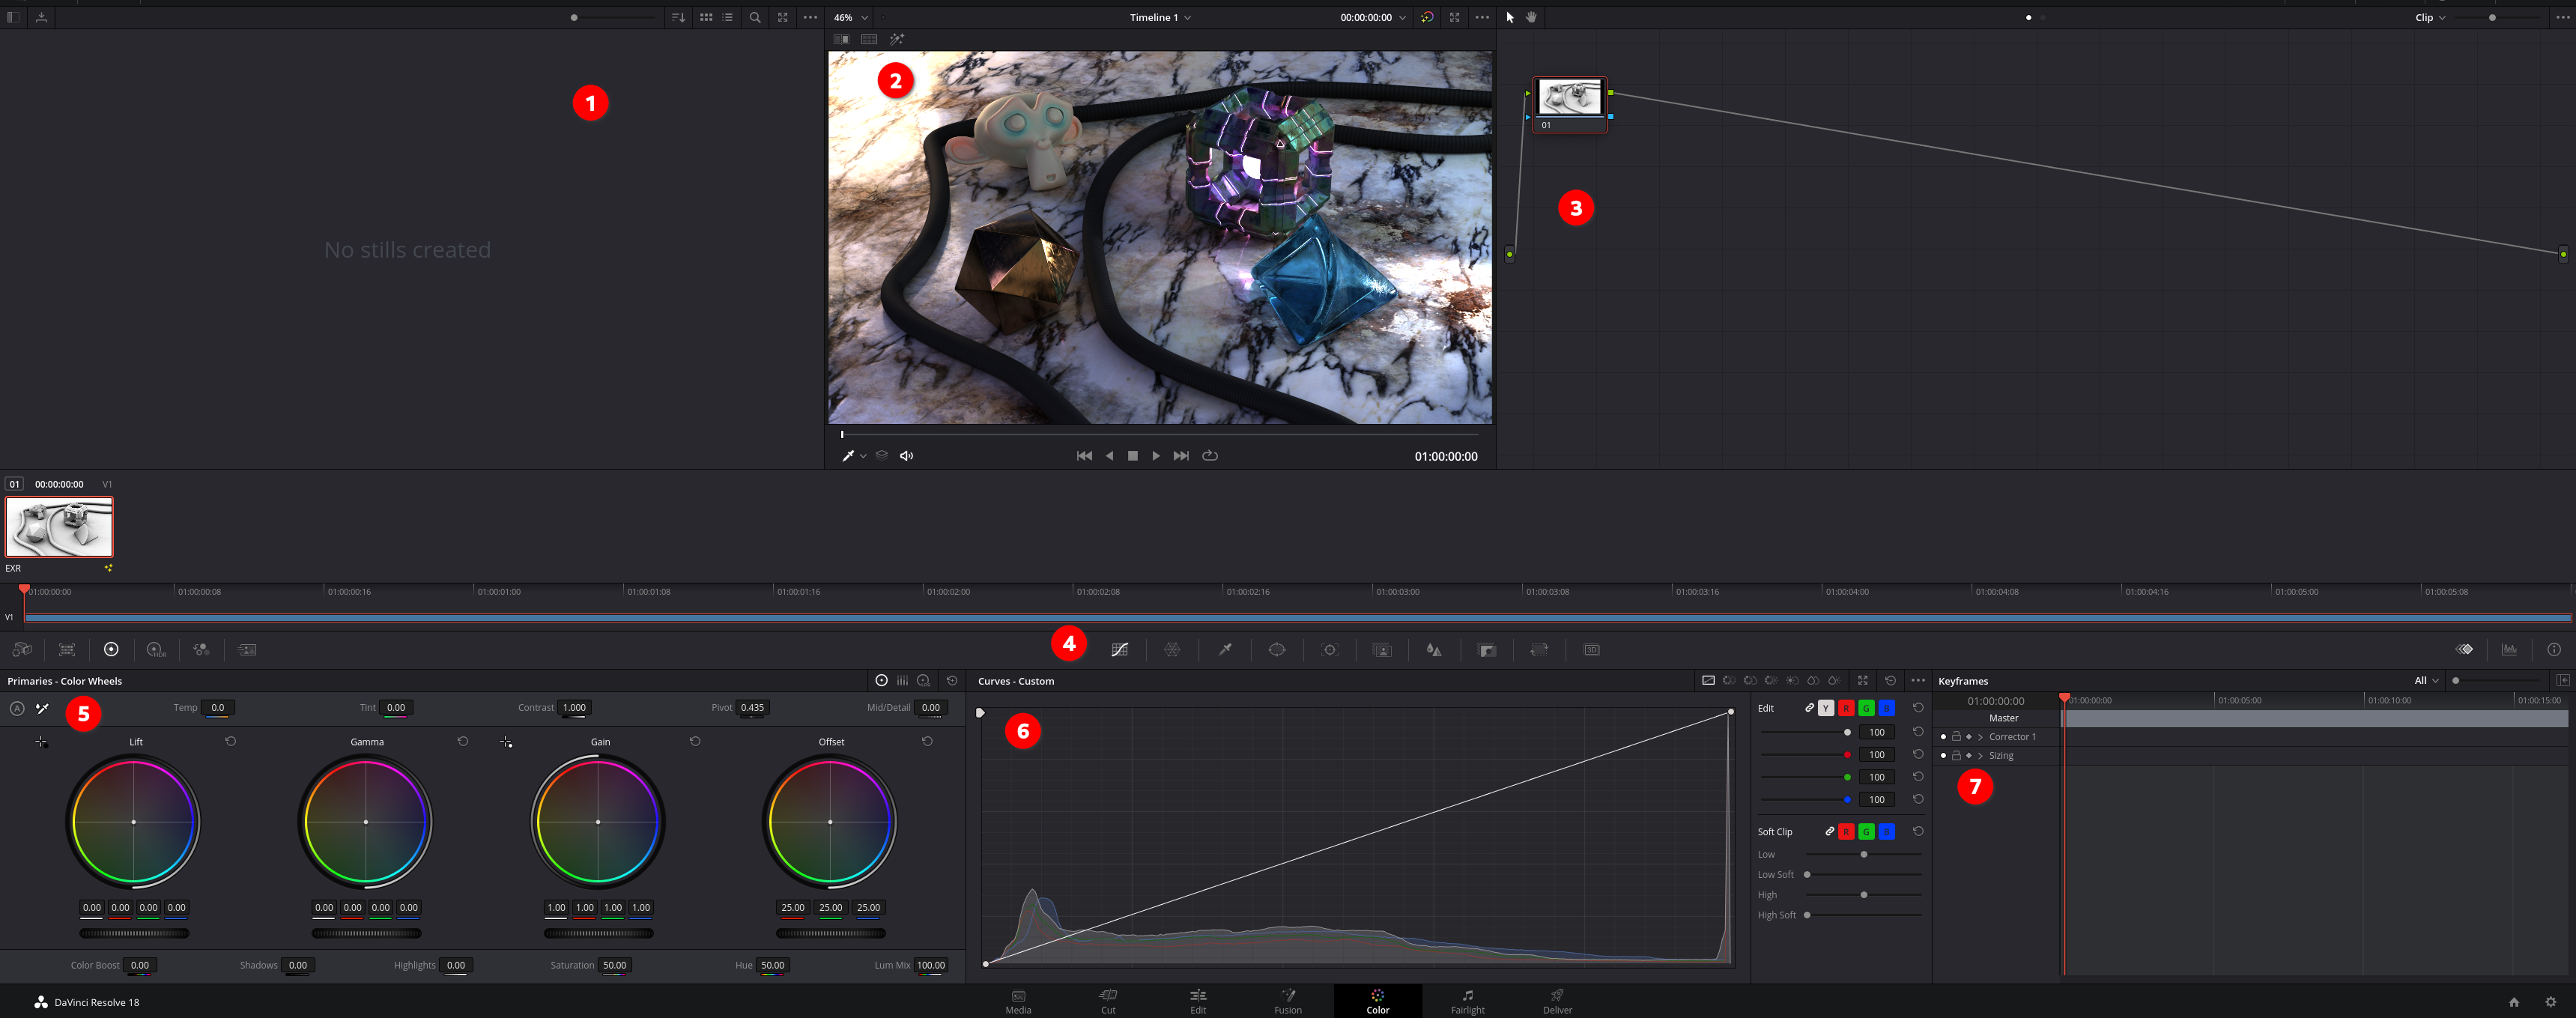
- Stills
- Viewport
- Color grading node graph
- Toolshelf
- Color correcting tool wheels
- Tools (Correlate with toolshelf)
- Keyframes for animation
I’m not going to get into depth here, but you can do some really advanced things with color grading, keying and more in this context.
How To Color Grade ANY IMAGE - DaVinci Resolve Color Correction Tutorial - YouTube
# Exporting Footage
Use the Export context and select a file-type to render out to.
# Resources
Introduction to Compositing in Blender - YouTube
Compositing in Blender for Beginners (Tutorial) - YouTube
Lighting in compositing in Blender EP9 - YouTube
Comic Shading using the Compositor in Blender - YouTube
NUKE FOR NOOBS | Basics Of CG Compositing (Part 1) - YouTube
Compositing 3D Models into Photos Using Fspy and Blender - YouTube
Simple Compositing | Blender Compositor | After Effects | Davinci Fusion | Natron - YouTube
Color Key Node Blender Compositing - YouTube
Composite CGI Around Real Object - Blender VFX Tutorial (FULL) - YouTube
Using Cryptomattes in Blender 2.8 - Compositing Tutorial - YouTube
Advanced CG Compositing Course in Nuke - NK606 RELEASED! - YouTube
Denoise Shadow Pass - Blender Octane Render - YouTube
Compositing for 3D artists - 03 - Compositing fundamentals (In fusion) - YouTube
Add VFX into Cinematic RAW+LOG Footage (the right way) | ACES Part 1 - YouTube
Mimic Volumetric Fog Using Only Compositing (Blender Tutorial) - YouTube
Blender Compositing Quicktip: Easy Atmospheric Falloff - YouTube
Render Passes for Concept Art l Blender to Photoshop - YouTube
How to Save Final Image After Compositing (Blender) - YouTube
The Secret Key To Controlled Renders - YouTube
Blender 2.8 Tutorial: View Layers and Render Layers as separate images - YouTube
Blender Compositing Tip: Using View Layers for more control - YouTube
Sorry Blender, this is my new compositor - YouTube
Make Your Renders Pop - Intro To The Compositor - YouTube
Color Key Node Blender Compositing - YouTube
Blender and Fusion Multi-Layer Workflow - Render Passes and Compositing for Beginners - YouTube
Import Blender Scene Into Fusion! - Blender Camera and Mesh in Resolve! - YouTube
How to Export an Image from DaVinci Resolve Fusion (Single Frame to JPG, PNG, etc…) - YouTube
# Tangential Resources
How I Create Cinematic CG Environments | FULL BREAKDOWN - YouTube
Understanding Composition - YouTube
Compositing 3D Models into Photos Using Fspy and Blender - YouTube