Navigation in Blender
Blender is a free and opensource 3D software that includes most tools for a standard animation pipeline.
# Getting Your Footing
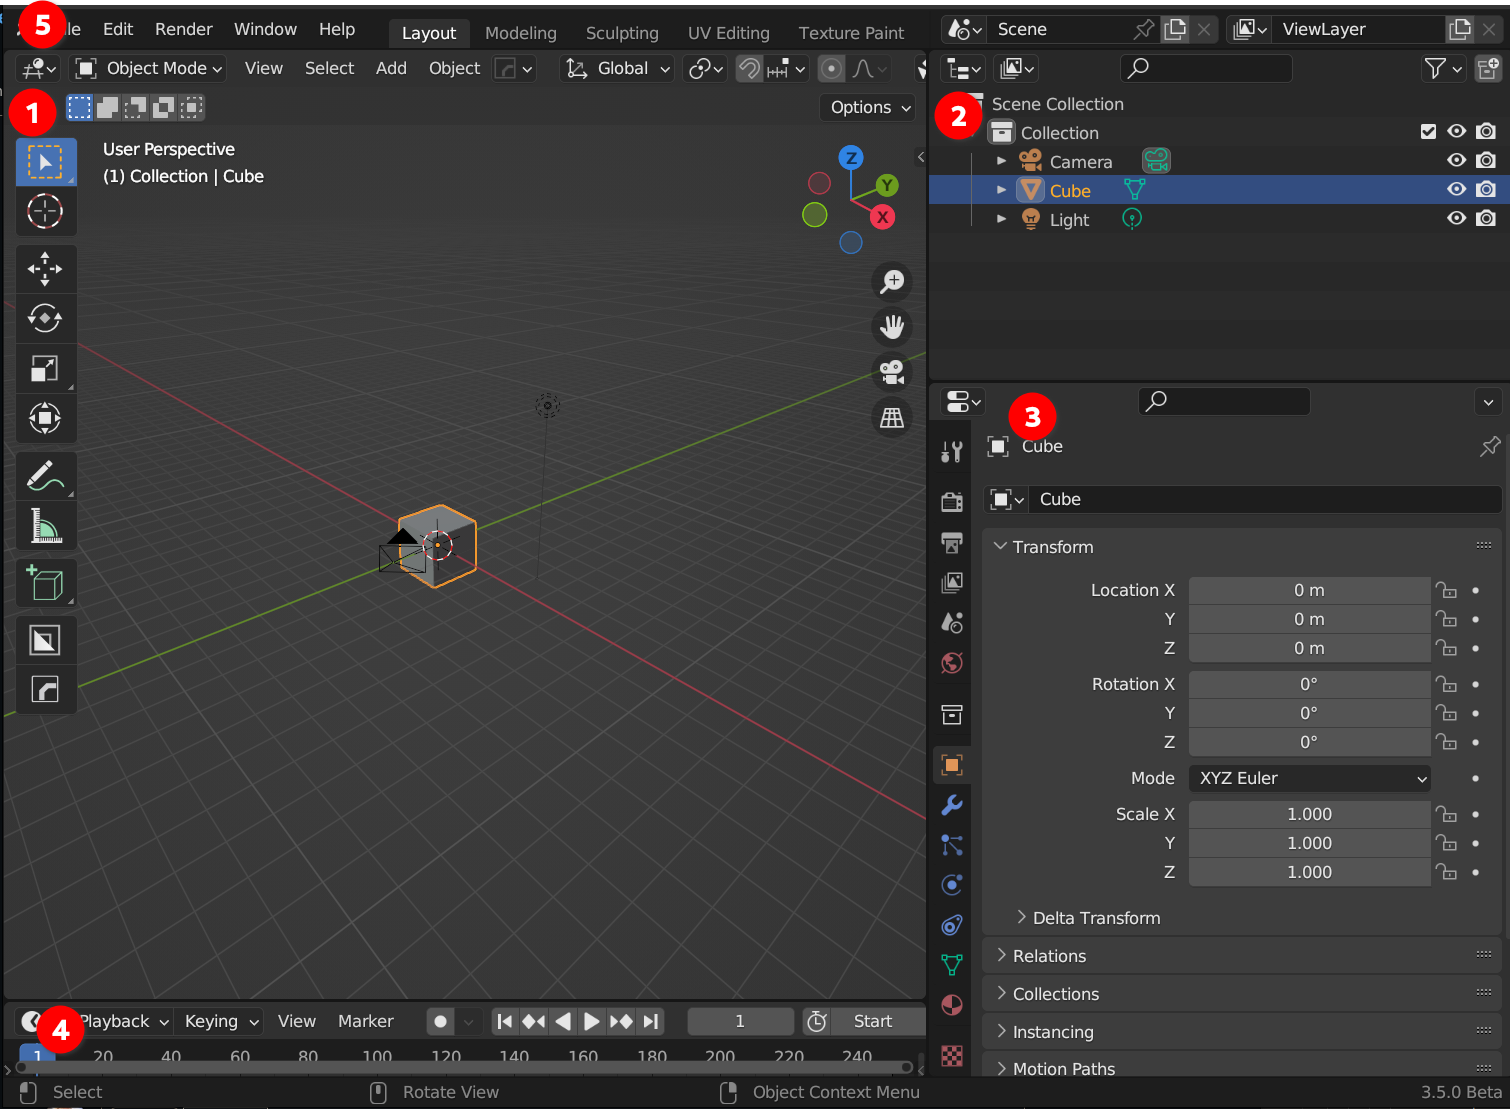
This is what you see when you open a default new blender config.
- 3D Viewport
- Outliner
- Properties
- Timeline
- Main menu bar
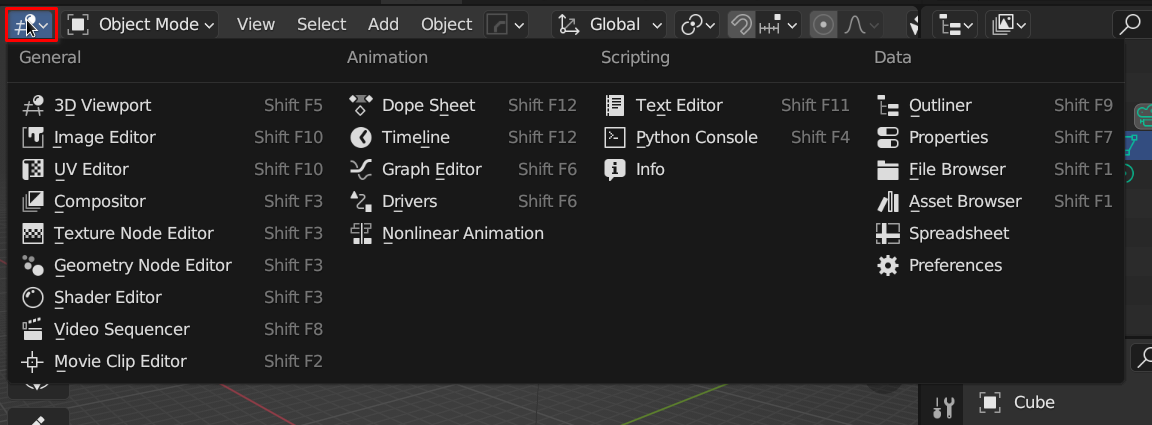
There are many different windows and they can be found at the top-left of every window and switched:
The Blender hiarchy works like this
- Global
- Windows
- Selection
- Context dependent Modes
- Selection
- Windows
Modes are a fundamental to working with blender. The first modes you will probably be most familar with are the mesh editing modes.
In the 3D viewport you have context depended modes based on the selection. However for the most part you will dealing with:
- Object Mode
- Edit Mode
Within edit mode there are context dependent modes based on the type of object selected.
For a standard mesh you can switch to the following editing modes:
- Edge
- Face
- Vertex
Other types of objects may have slightly different edit modes
For more background see CG FundamentalsCG Fundimentals
# Make Blender Fully Portable
If you want to run blender from your USB and have all of your settings follow you around you need to set up a few things.
Before that however you need to download the portable version of blender from blender.org.
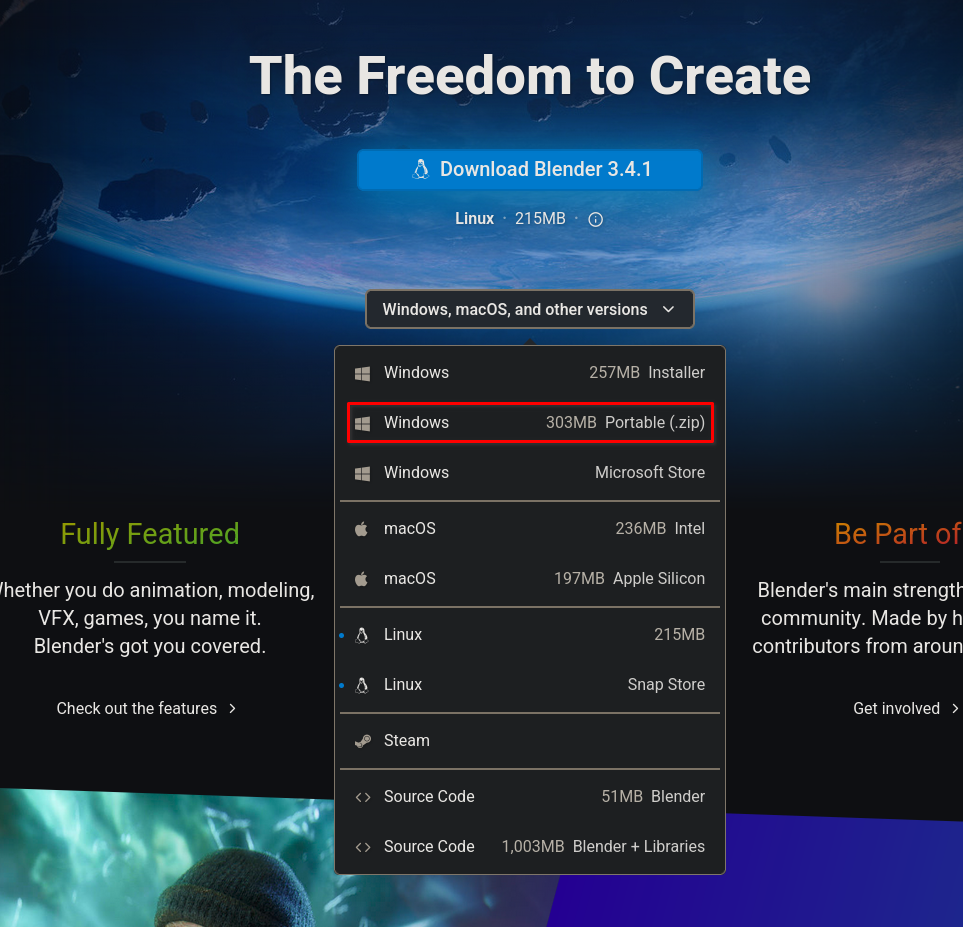
If you are on linux, the download from the website is portable by default. If you want a normal install then just install blender from your distros package-manager as usual.
I’m unsure about portable mode on mac
Once you download it you should extract the zip archive to your USB of choice.
Navigate to the blender folder you extracted then into the folder with the version number.
The path should look something like this:
~/Blender-3.2.2/3.2
Once inside that folder make sure the two following folders exist, and if they don’t create them:
- config
- scripts
These are case sensitive
Now you have a working portable version of blender.
# Addons
Before moving on, you should install the following addons!
Addons are python scripts that can extend blender in many ways.
Blender comes with many built-in addons. Before we install a new one let’s make sure a few are enabled.
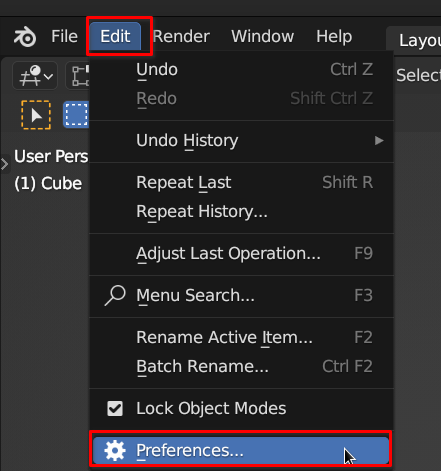
First navigate to the preferences from the edit menu.
Then find the tab named addons
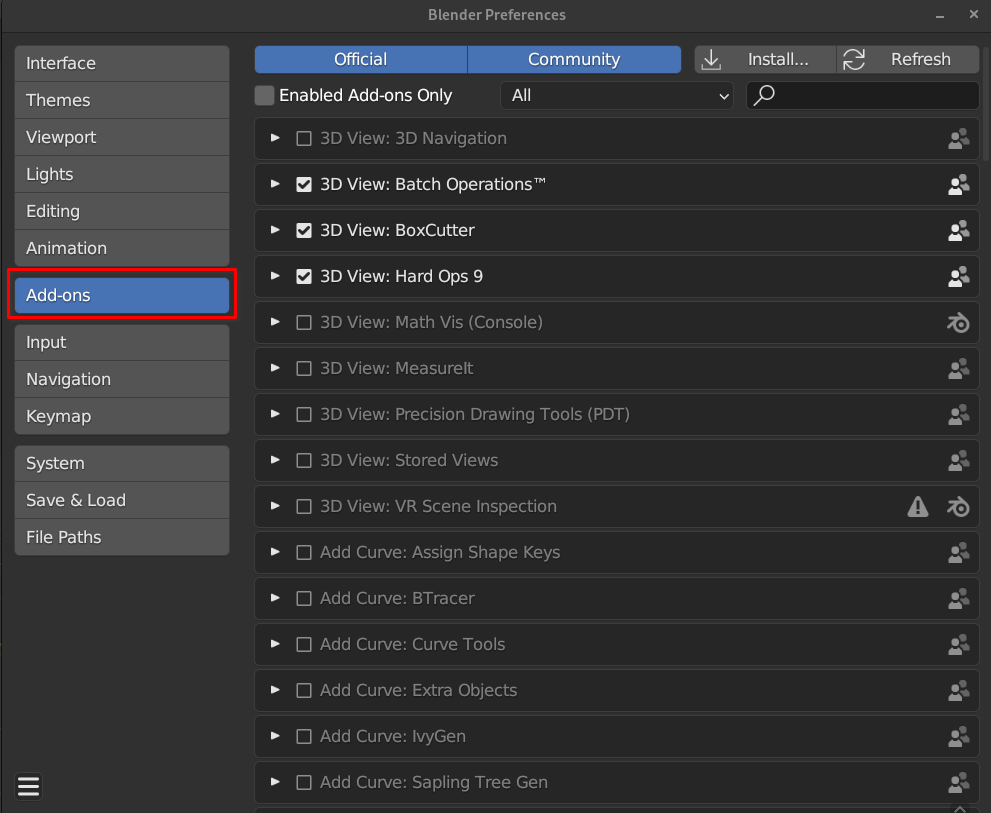
Here you will see all the official addons that ship with blender.
Let’s turn on the following addons:
- Node Wrangler
- Magic UV
- Edit Mesh Tools
- Loop Tools
- Mesh: F2
- Import Images as Planes
Feel free to try out any you are interested in beyond this list.
Now for custom addons. There are few I want you to go download:
For the github link do the following:
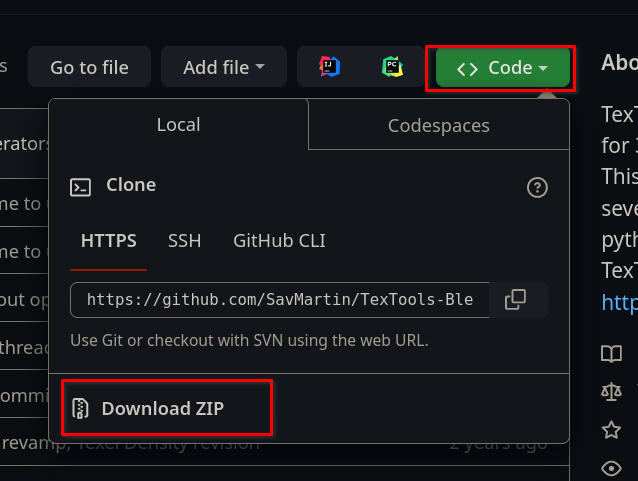
Download the ZIP.
Once you download the ZIP DO NOT extract it. Unless the instructions say otherwise.
Now in the blender addon section of the preferences click the install button and find the zip file and install it.
Once it is installed click the checkbox to activate it.
# Hotkeys and the Blender Workflow
Unlike most other 3D applications blender is meant to be used by hitting chains of hotkeys. This is By Far the fastest and most efficient way to use blender. In many ways it is similar to using something emacs or vim for writing and coding. Eliminating time consuming clicks and navigating through menus with shortcut combinations is much better once you learn it.
Feel free to use the gizmos and menus, they are there for a reason. *However *make an effort to learn the hotkeys. In most cases the hotkeys are listed next to the menu item. You won’t get better if you don’t push yourself.
# Navigation
There is a lot to learn about navigating in blender.
You can use industry hotkeys, however, I strongly advise against it. I think it will hold you back in the long run.
The reason being that blender is designed to work quickly and efficiently by minimizing clicks and menus and gizmos. Learning the blender way will make you much much more efficient.
To this end, I will be focusing on the blender way to do things.
# Navigating the 3D Viewport
Let’s start with the 3D viewport. You will be spending a large amount of time in the 3D viewport.
For standard 3D navigation blender uses a middle click scheme.
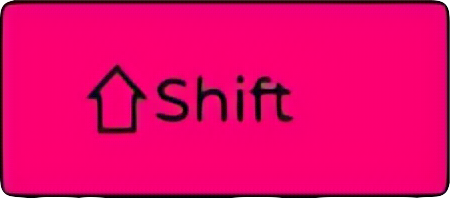
Middle-Click + Mouse Drag=> Orbit the cameraMiddle-Click + SHIFT=> Pan the cameraMiddke-Click + CNTRL=> Truck/zoom the camera
You can also do first person style navigation like in Unreal Engine:
 +
+ =>first person style navigation
Focusing on objects is an important function for speed and efficiency. In the blender there are a few ways to do this:
PERIOD(numpad)=> Focus on selection
forwardslash/questionmark=> This will isolate the selected object into a new blank scene. (Much likeCNTRL+1in maya)
# Edit Modes
First I will go through the vanilla way to do things, then I will talk about Machin3tools.
In your default scene you should have the default cube in the center. Select it with Left Mouse Click (Unless of course you are using right click select).
From here you can do a few things.
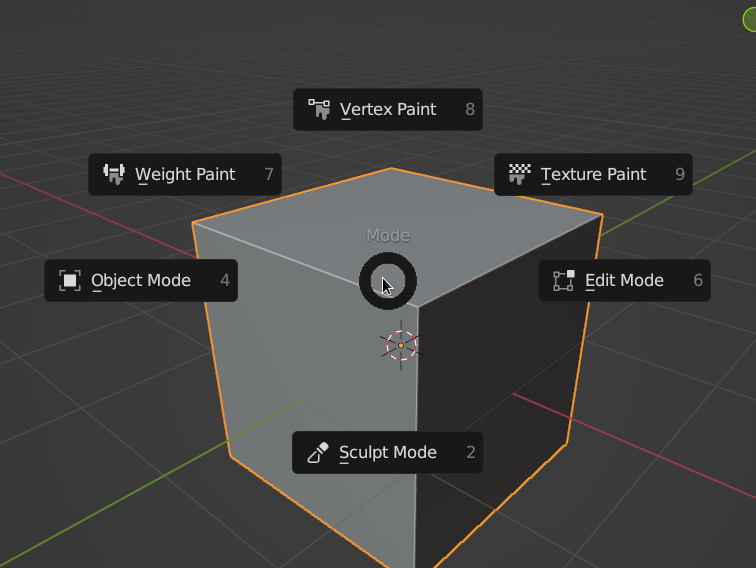
In the viewport the Mode menu is here:

You can select edit mode from here. However the better way to do this is simply by hitting TAB
The default behavior of
TABis to switch between the last used modes in case you are using a different mode.
The next best way to do this is by hitting the following hotkey:
CNTRL+TAB=> This will show a radial menu of all the modes.
In radial menus you can do two things:
- Just hit the hotkey then the radial menu will stay open and you can click an option.
- Flick the mouse in the direction of an option right after you hit the hotkey and it will quickly switch you to that mode.
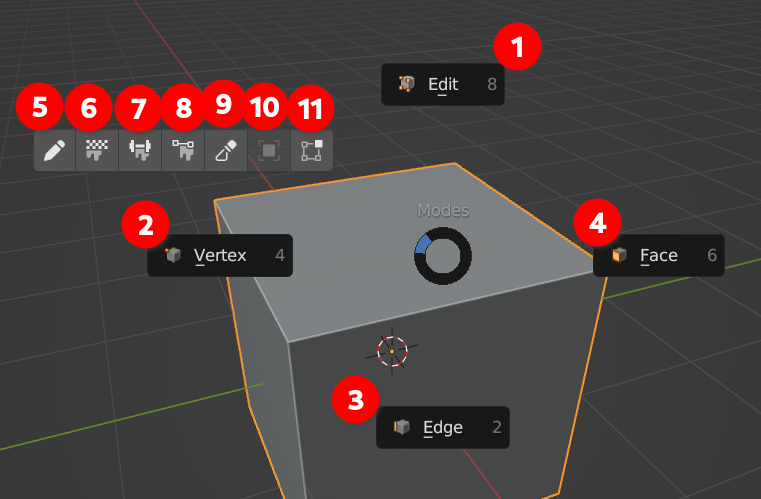
Before I talk about Machin3tools let’s talk about the components in edit mode.
Once you are in edit mode of a mesh you have additional options to edit the different components of a mesh.
In vanilla blender you can switch through these in a few ways.
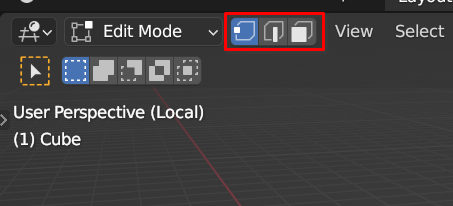
You can click the buttons as shown above. This is slow and inefficient however. So instead do the following:
The number keys 1 - 2 - 3 correspond the respective modes:
- Vertex
- Edge
- Face
Now for Machin3Tools. Make sure you have it installed.
Once you have it installed it will override the TAB functionality with a custom radial menu. This will make it even faster to edit in blender. Similar to the RIGHT-CLICK Drag in Maya.
- toggles between
editmode like normalTAB - goes directly to
vertexmode - goes directly to
edgemode - goes directly to
facemode - Grease pencil (
draw) mode Texture PaintmodeWeight PaintmodeVertex PaintmodeSculptmodeObjectmodeEditmode
# Editing the Mesh
There are many operations you can do to edit the mesh. Let’s start with the basics.
All edit operations start with selections.