Houdini Squib Setup
# Simple Squib Setup in Houdini
Squibs are used in VFX for small explosions like gun shots and things. In practical effects squibs are small explosives that are rigged to blow at the right time. In VFX we often have to recreate these.
# Geo setup
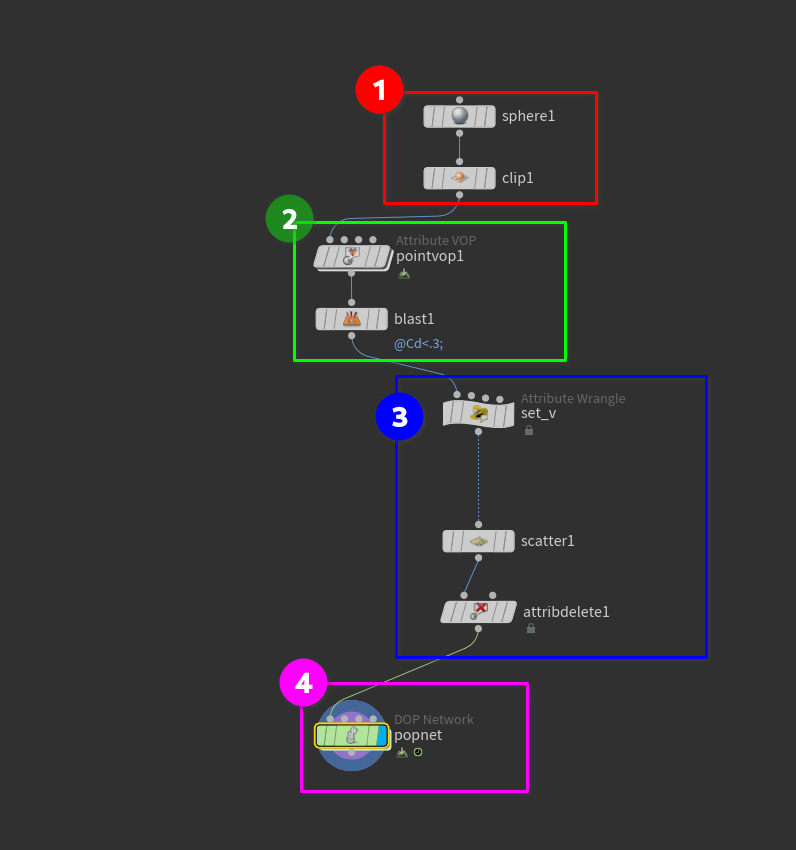
- Initial Geo -> In this case we are using a sphere and clip node to only get the top part of the sphere. This is because squibs typically explode from the ground.
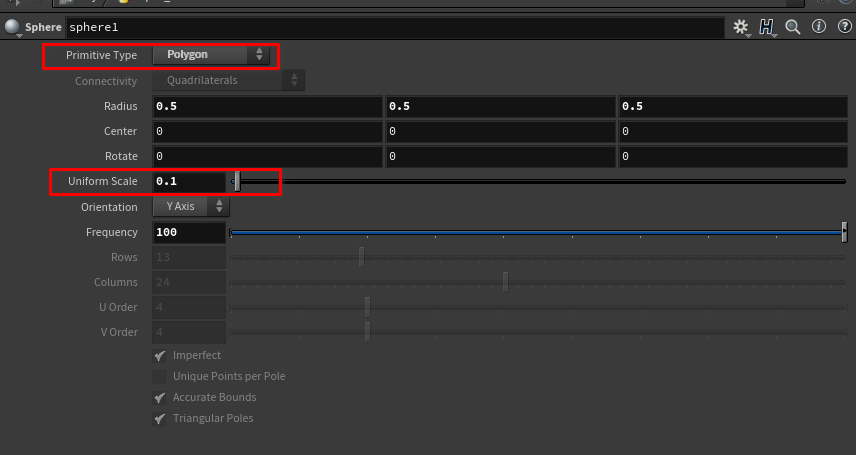 -> We have turned the scale of the sphere down so that it makes sense in the real world.
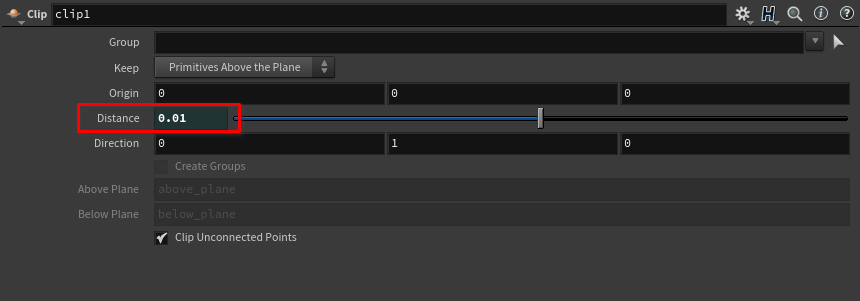 -> The
Clipnode is used to cut the sphere and lower it to the ground plane.
-> The
Clipnode is used to cut the sphere and lower it to the ground plane.
- In this section we are setting up some variation for the particle spawning down stream in the network.
-
 -> the
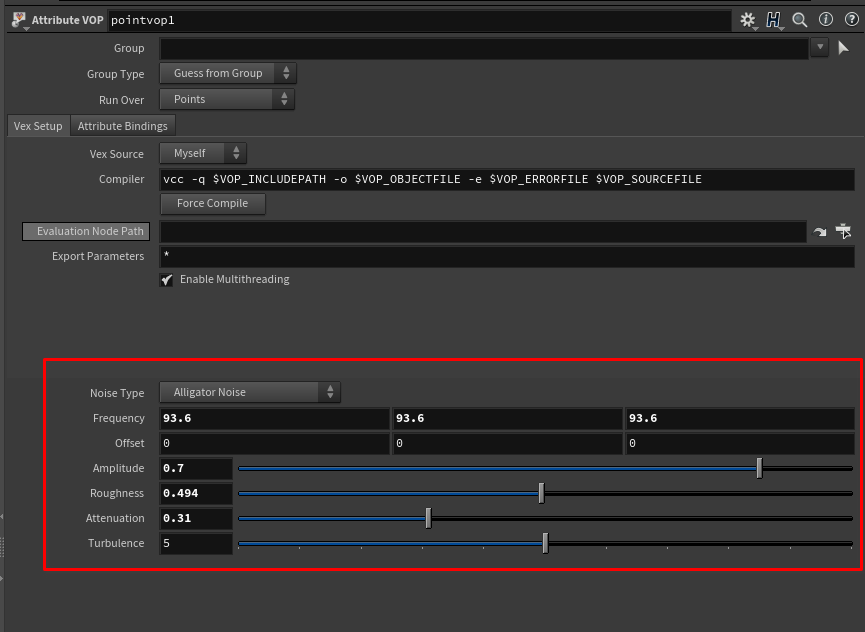
Attribute VOP node creates noise for the downstream operation.
-
-> the
Attribute VOP node creates noise for the downstream operation.
- 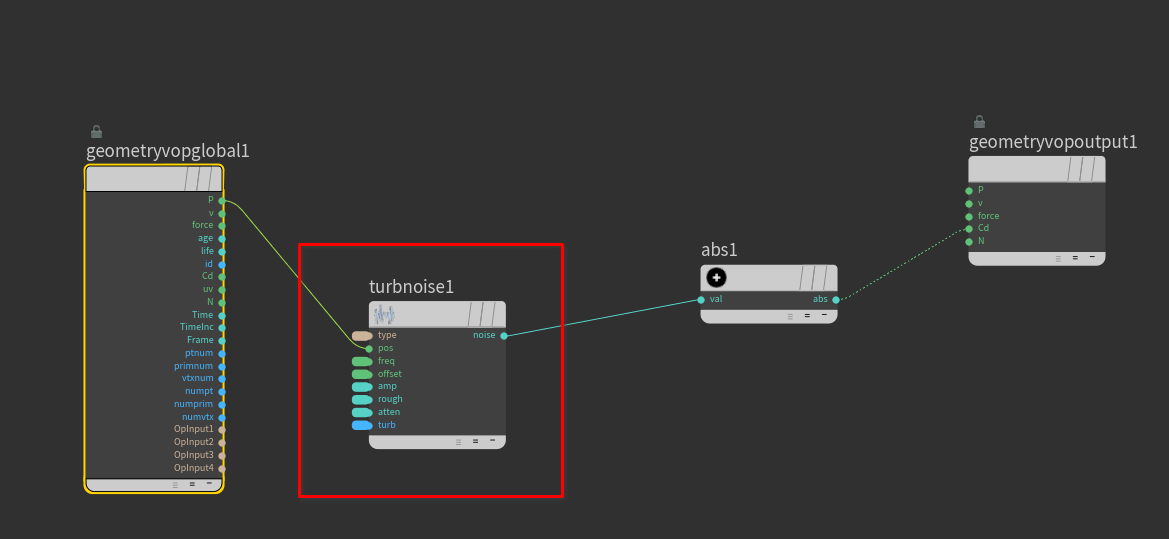 -> This is a simple VOP setup. We are taking point position (
Geometry attributes) and feeding it into a noise node (Which all of the parameters are promoted to the top of the VOP net). After that we feed into an
Absolute node, which takes any negative value and makes it positive. After that we feed that into Color output which in Houdini is Cd.
- In order to quickly promote all parameters in a VOP node right-click the node then do the following ->
-> This is a simple VOP setup. We are taking point position (
Geometry attributes) and feeding it into a noise node (Which all of the parameters are promoted to the top of the VOP net). After that we feed into an
Absolute node, which takes any negative value and makes it positive. After that we feed that into Color output which in Houdini is Cd.
- In order to quickly promote all parameters in a VOP node right-click the node then do the following -> 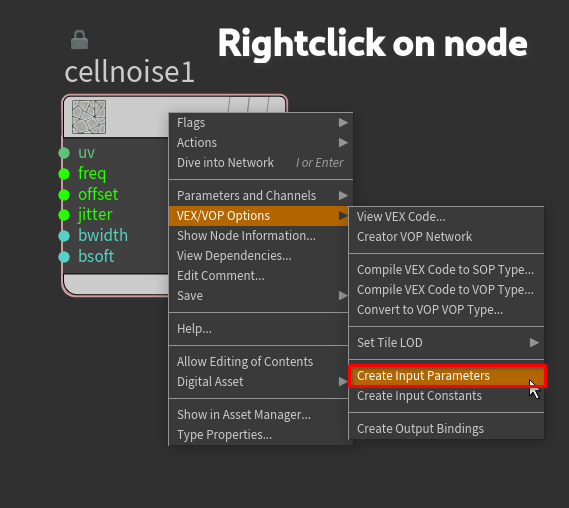
- In this section we set up the Vectors we need for the Pop solver.
 -> In the
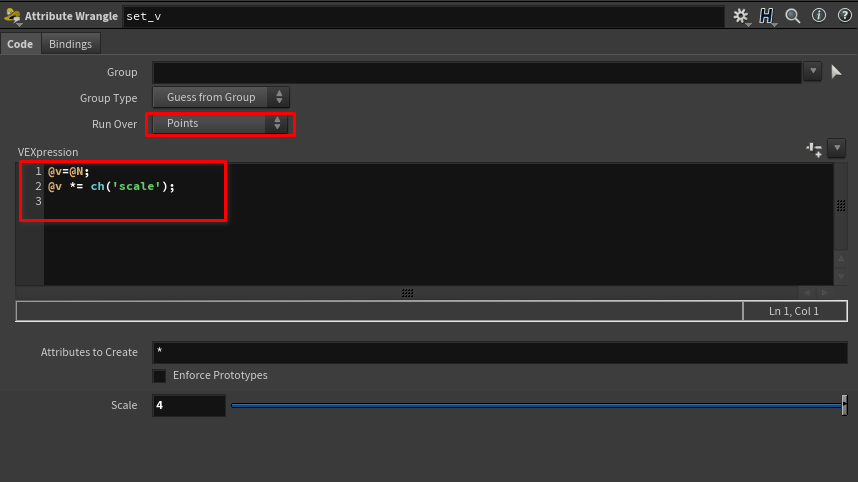
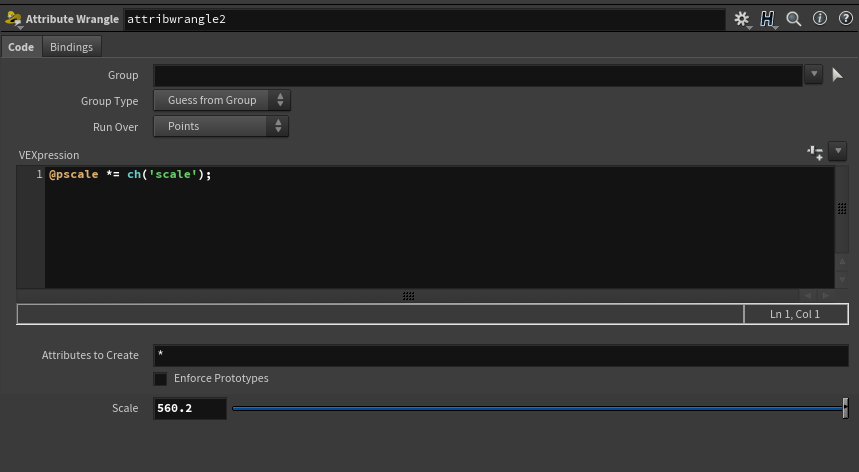
Attribute Wrangle make sure it’s set to run over points and in the code window make sure you type the following
-> In the
Attribute Wrangle make sure it’s set to run over points and in the code window make sure you type the following1 2@v=@N; @v *= ch('scale');We will tune the scatter values later
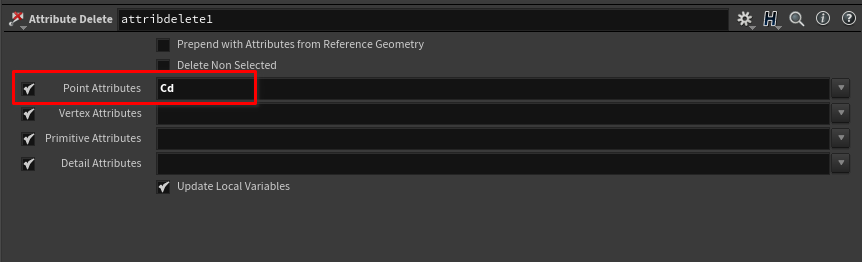
In the Attribute Delete node made sure in the points section you have Cd for color written.
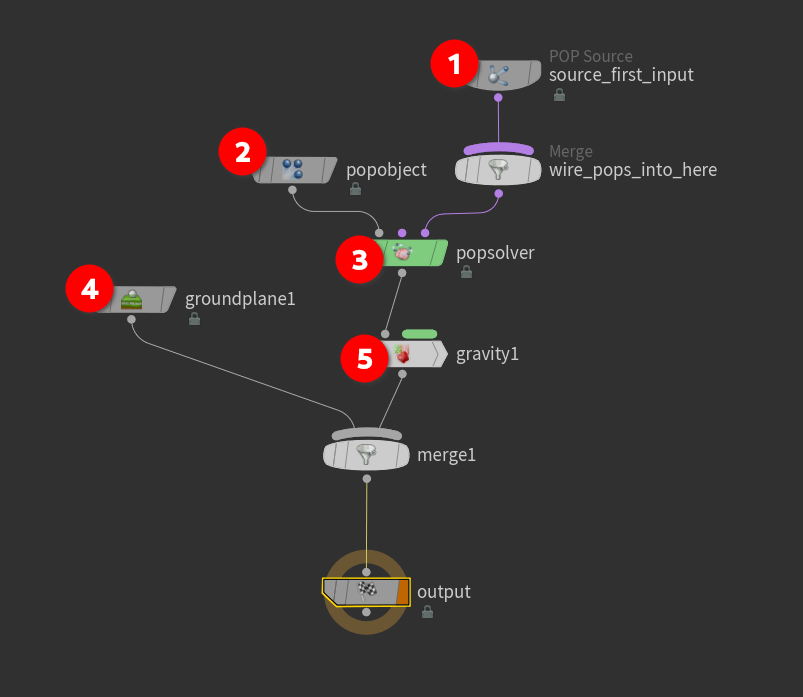
- Make sure you feed the stream into some sort of DOP network. This could be a plain DOP net or a configured POP network. The next section goes over the Pop solver setup.
# Pop solver setup
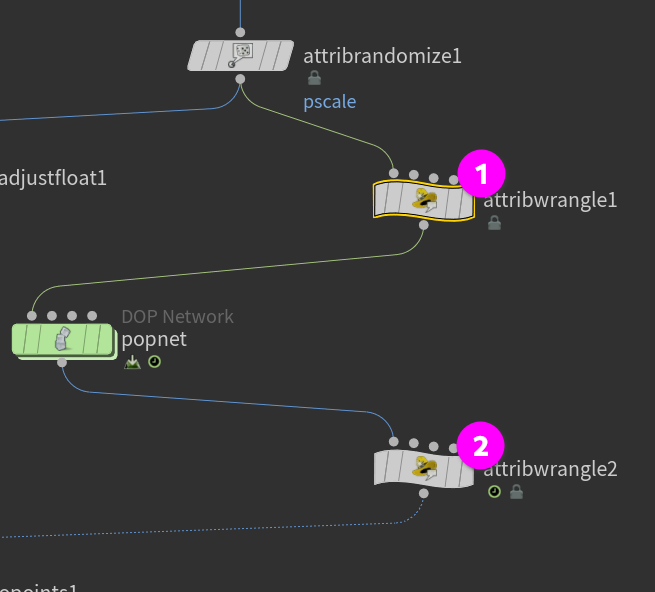
The POP network is technically in a DOP Network node. This type of node can contain any type of simulation system. For the squib, we will build a POP system in the DOPnet.
A POP system is a simple particle simulation setup.
- Pop Source
- Pop Object
- Pop Solver
- Ground Plane
- Gravity
The simulation contexts of Houdini can get very complex and the following are just some settings I used and some explanations why.
There a million and one ways to do things, Especially in Houdini! Just use this guide as a starting point!
Add variance to the Pop source ->

In the attributes tab set the Initial Velocity to Add to inherited Velocity. Then you can change the Variance vector
The pscale attribute needs some tweaking. In order to create a more realistic simulation each particle needs a different scale, just like in real life dirt particles are different sizes and masses. There are two simple ways to accomplish this.
-> Two wrangles, one before and one after the DOP network. In the first one do the following.
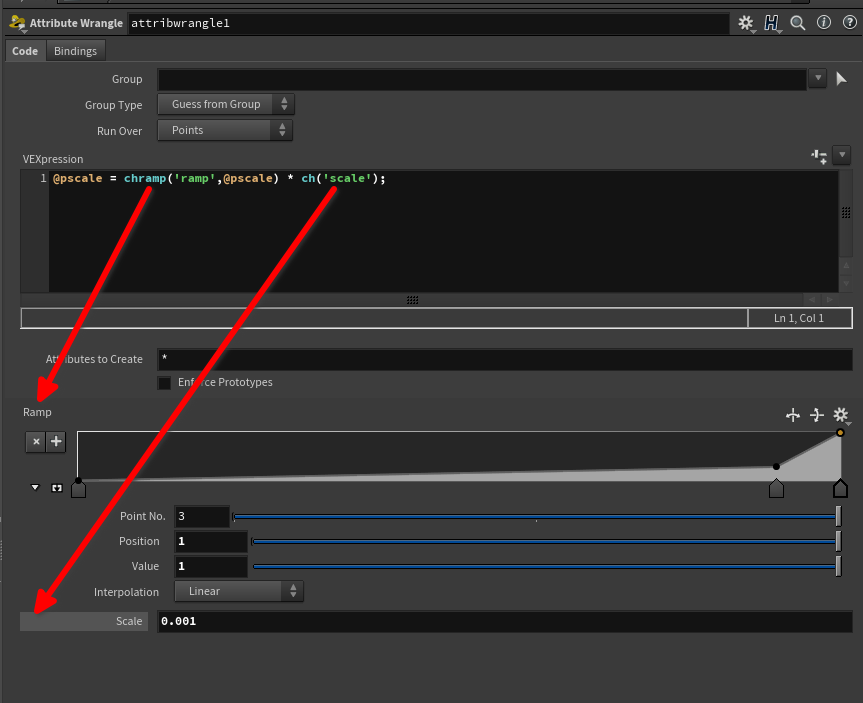
This way we can use a ramp to have more control over the pscale change.
In the second wrangle we can increase the pscale if we need to after the simulation.
The second way to do this is with an Attribute Adjust Float node. This can accomplish the same thing as the first wrangle.
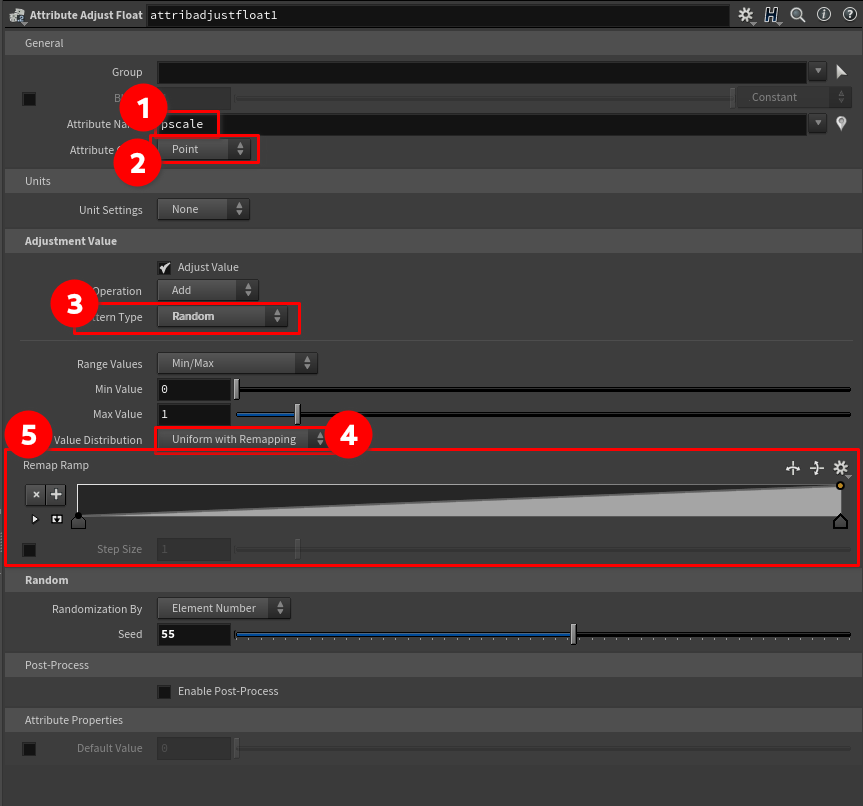
In the Attribute Adjust Float node made sure the attribute is pscale, and attribute type is Float. Then change Pattern Type to Random. Then set the Value Distribution to Uniform with Remapping. Once you do this you will have a ramp just like the one we set up in the wrange which will do the same thing.
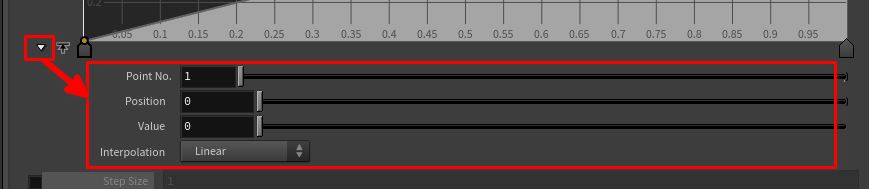
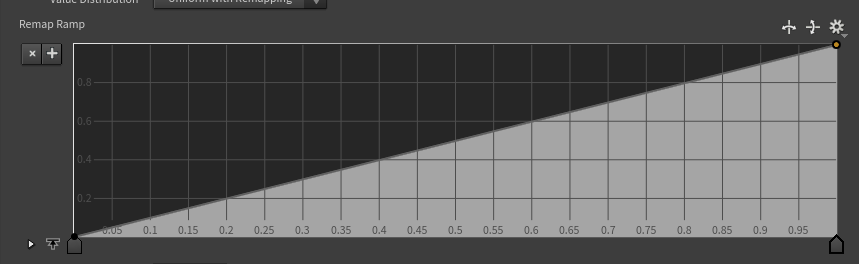
Expanding the ramp
If you click this button ->
the ramp will expand and look like this ->
Expanding the ramp parameters
If you don’t see the options for point on the ramp click the little white triangle ->
It will then expand like this ->