Setting Up Banking Curves in Houdini
# The Problem
A common problem you may encounter is adding the correct vector data to a curve to get the up and banking directions per point. There are many ways to do this, this is one way I’ve solved it.
# Getting Started
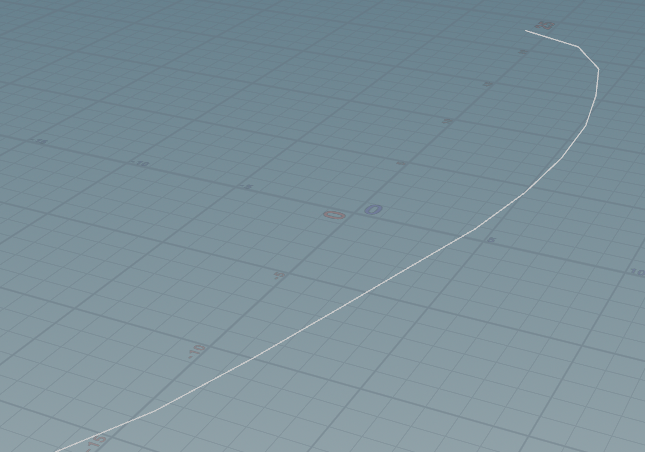
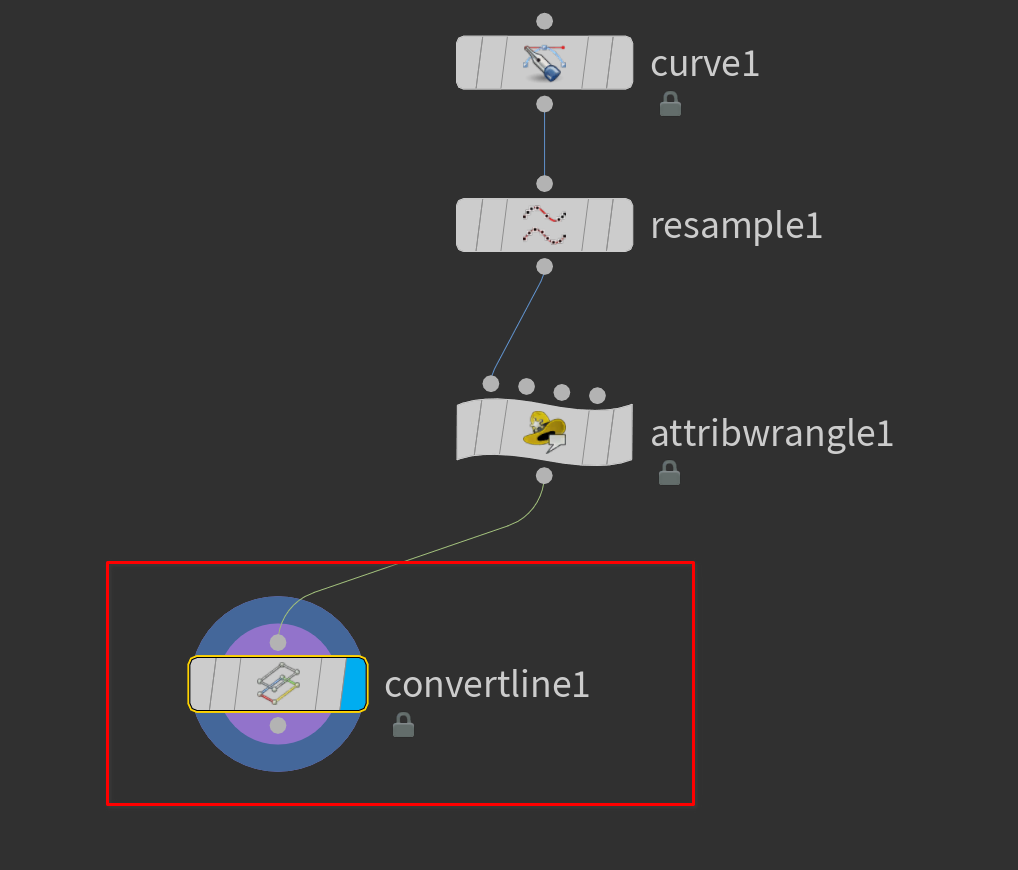
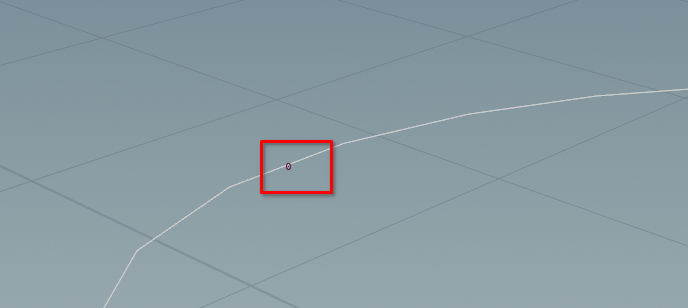
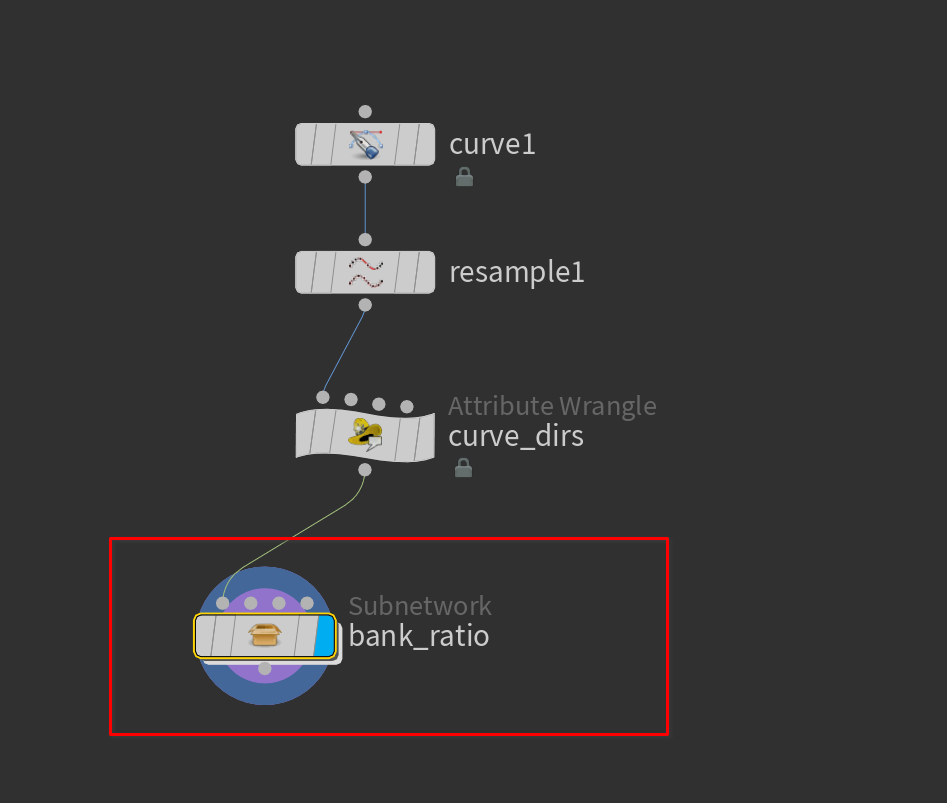
Start with some sort of curve or line.
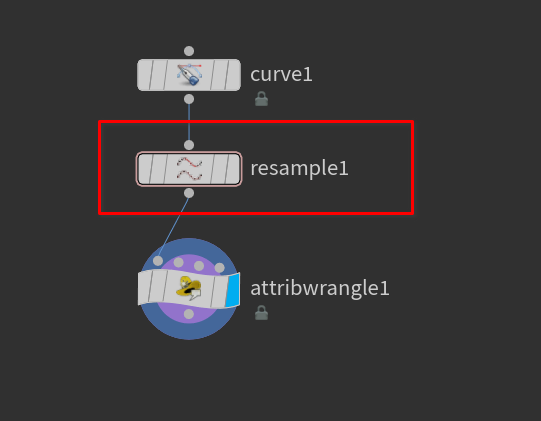
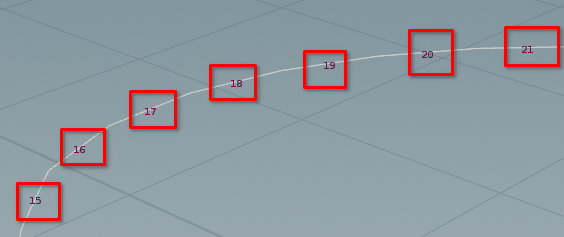
Once you have a curve drop down a Resample node.
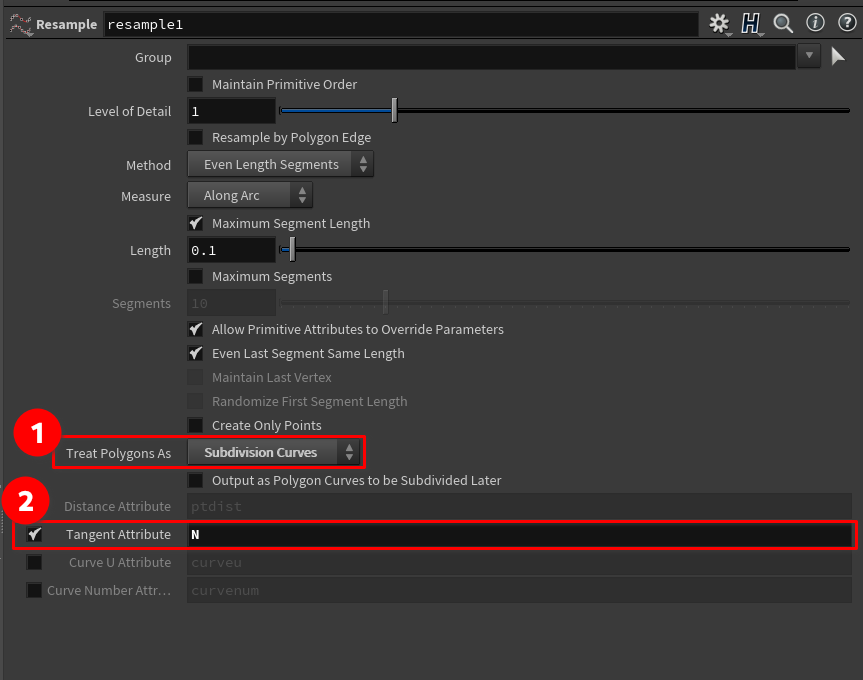
In the resample node there are two things we need to do.
- Treat polygons as Subdivision Curves
- Change the tangent attribute from tangentu to N (Normal)
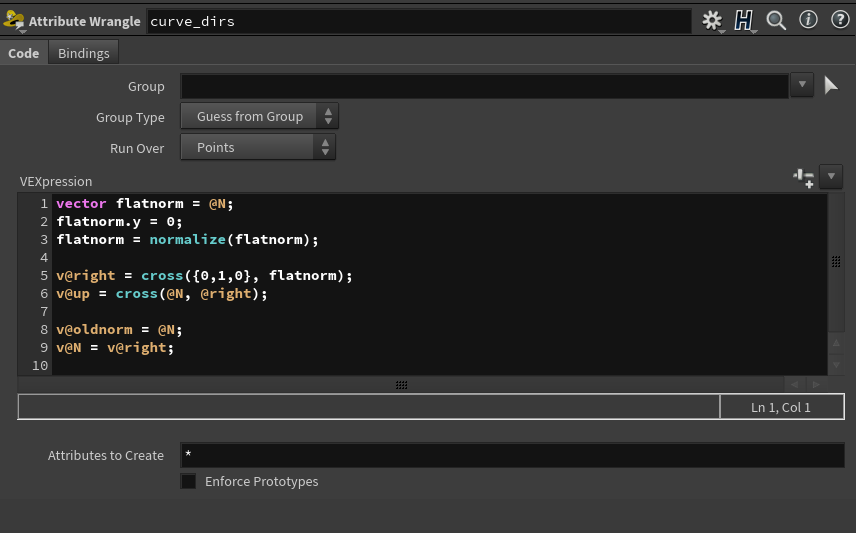
Now that that is setup. Drop down an Attribute Wrangle node.
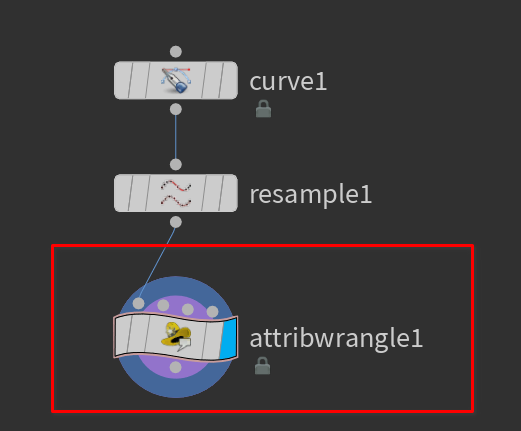 Make sure the wrangle is running over points.
| |
We are saving the oldnormal to use it later
You could add this as a preset -> node-presets
# Linear Algebra
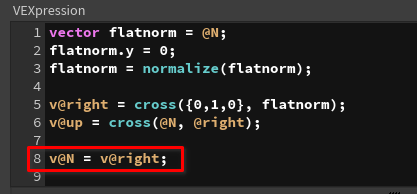
This is some standard linear algebra. Here’s what’s going on.
We make a new vector variable that’s the same as the normals on the points. Then set the Y part of the vector to 0, then
normalize our vector. Then we create two new vector attributes. this is done with v@something syntax. The first is a
Cross product of our first variable and a simple ‘{0,1,0}’ vector. The second is a cross product of our normal and the last attribute we just made.
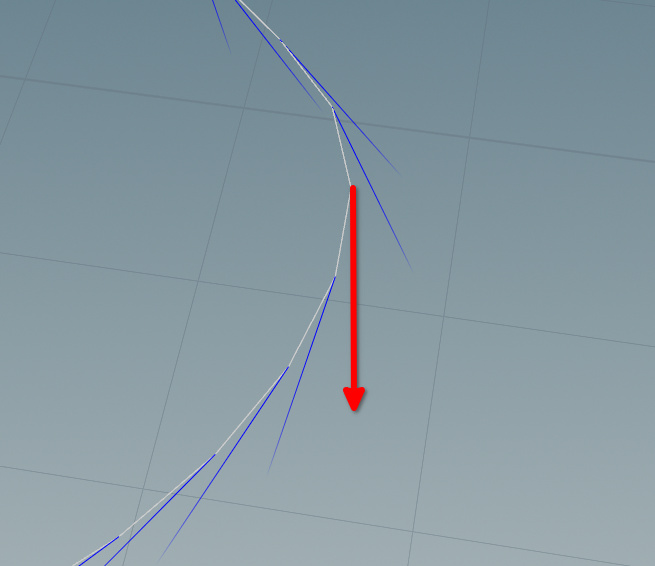
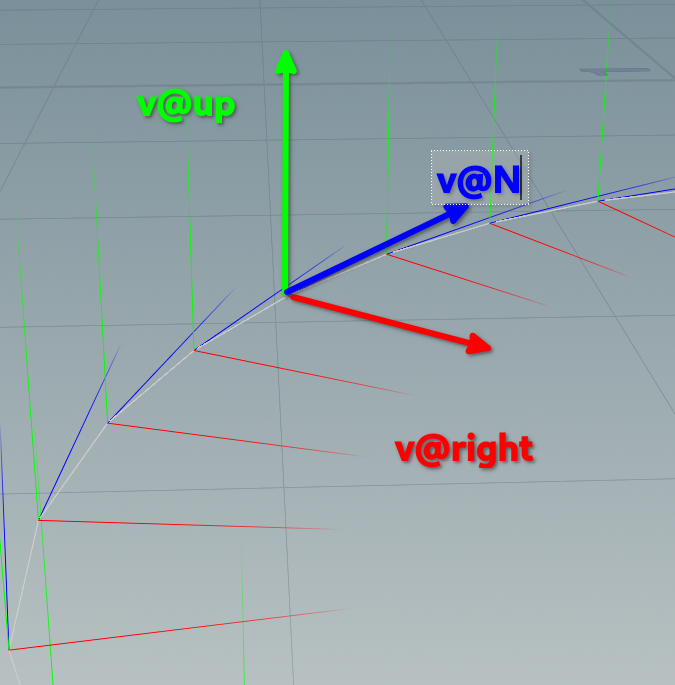
Now our normals look like this ->
Now that our points have the correct data we can start to use that data.
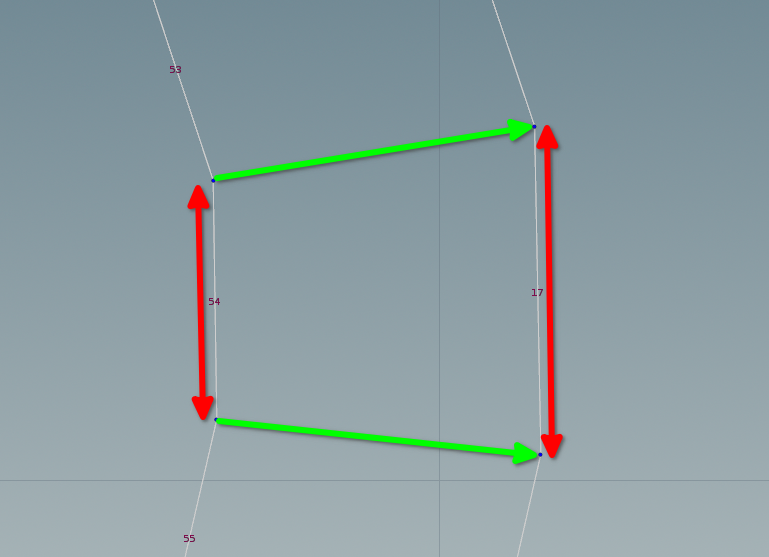
Drop down a Convert Line SOP node.
Convert line will split the line into separate primitives. Before the convert line node
After the convert line node
Convert line creates a restlength attribute.
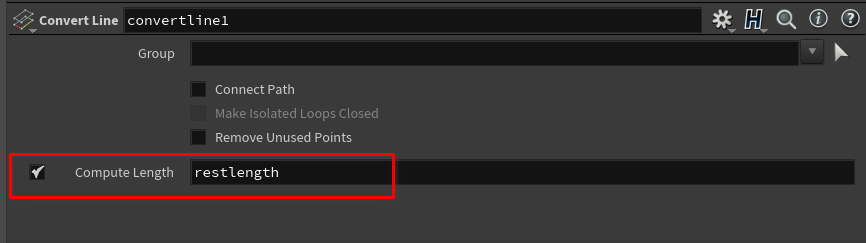
This will be very helpful later.
In the wrangle let’s add the following line at the end"
v@N = v@right;
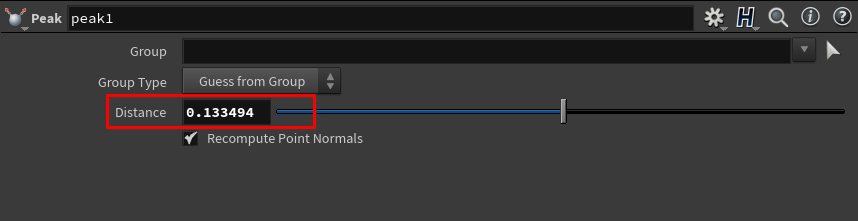
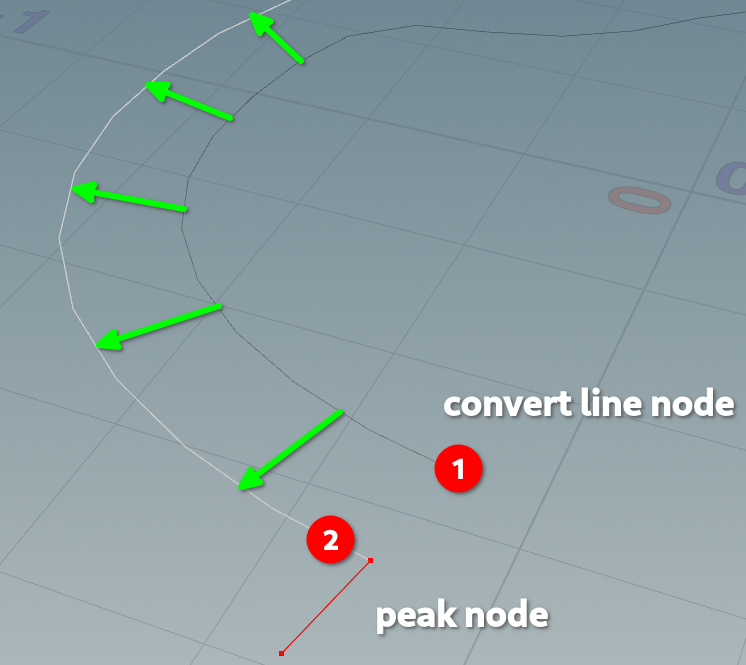
Then drop down a Peak node.

Scale the distance value a bit.
It should like this in the viewport:
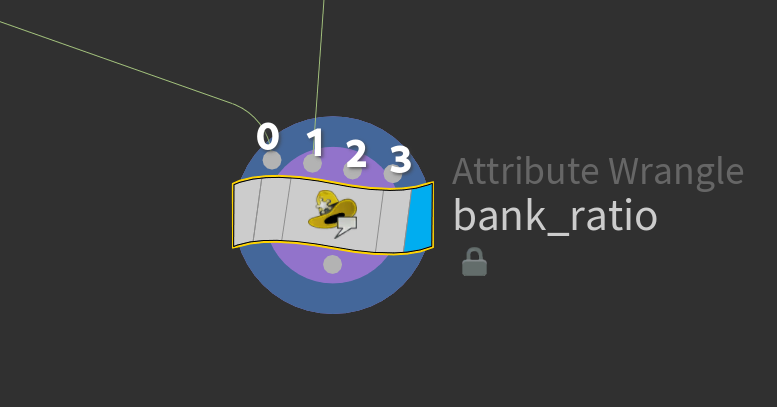
Next drop down another Attribute wrangle node.
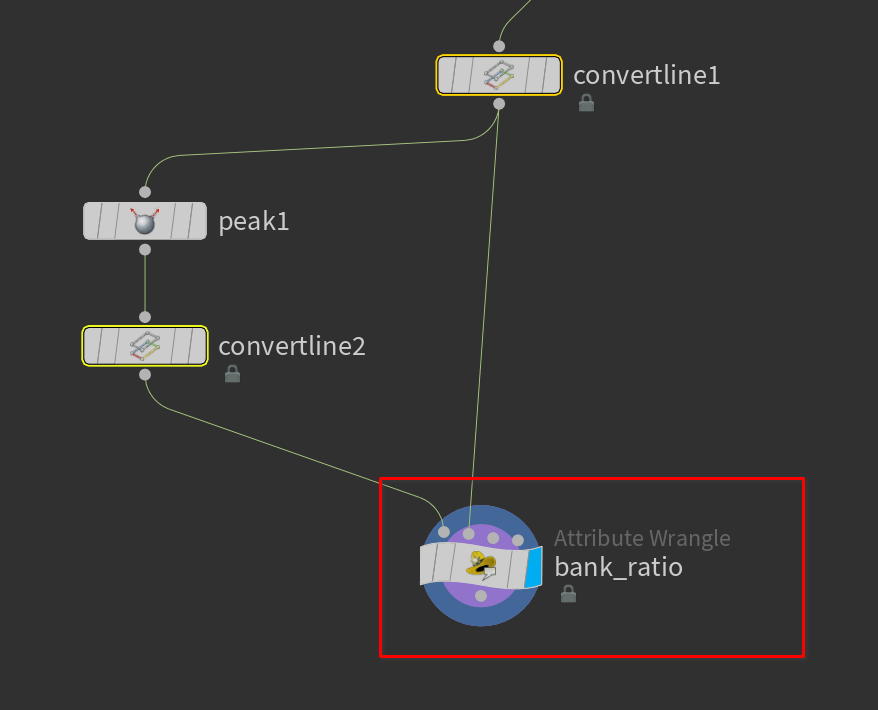
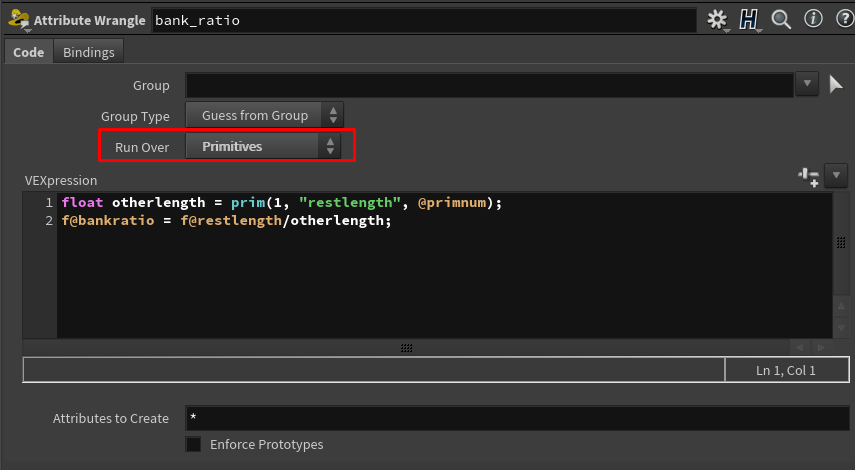
and attach both the original and the peaked stream. Here we will be comparing the length of the two primitives.
Make sure this wrangle is running over primitives
| |
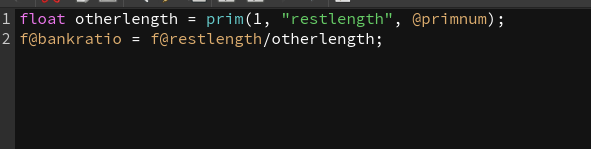
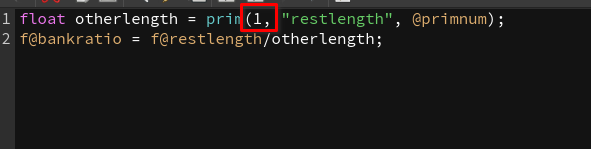
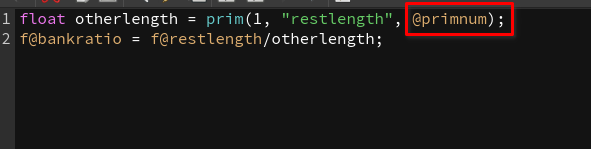
The first line we are using the prim function.
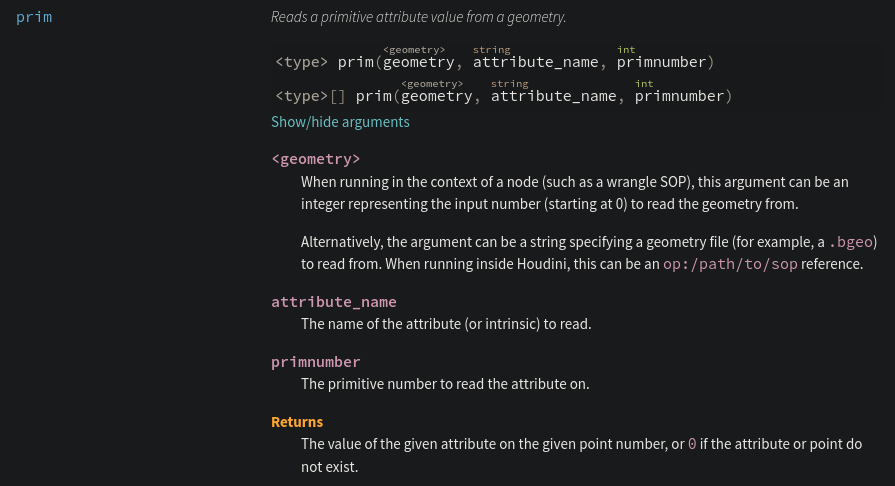
The 1 indicates we are using the second input of the wrangle.
restlength is the attribute we are looking for. The one created from the convert line node.
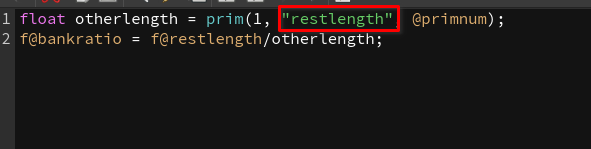
@primnum means we want to do this for each primitive.
Next we need to drop down an Attribute Promote SOP.
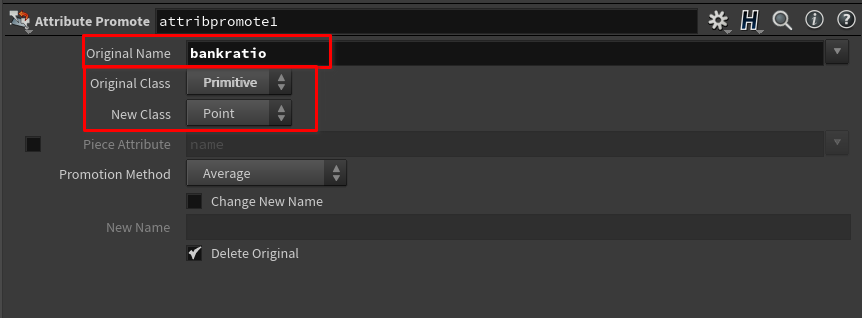
And then make sure the we are promoting bankratio from primitive to point.
creating a subnet If you wish you can put everything into a Subnet by selecting all the nodes you want to use and pressing shift+c
This will make it easier manage and create a digital asset with it I’ve created a subnet for the bank ratio stuff:
Next drop down an Attribute Transfer SOP.
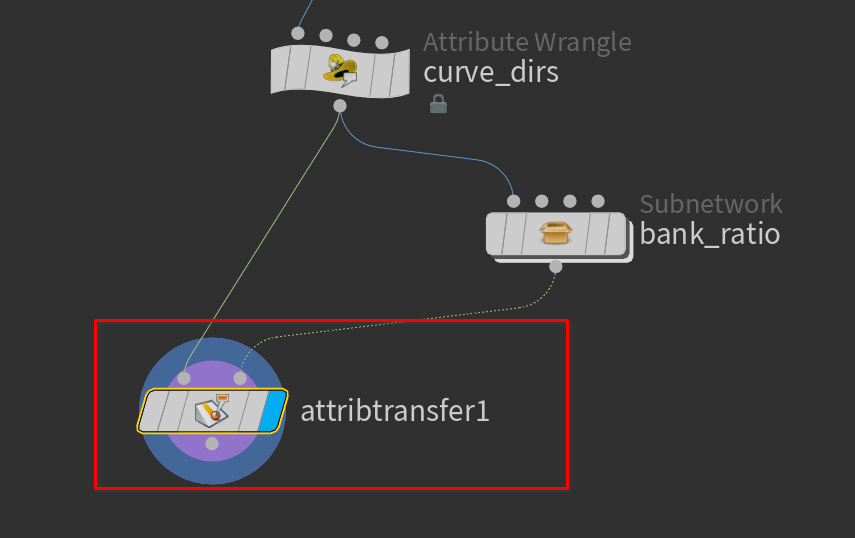
We want to transfer the bankratio attribute to the other curve.

Visualizers are an important part of a Houdini workflow. see houdini visualizers and Visualizers documentation
Let’s drop down a Visualizer node.
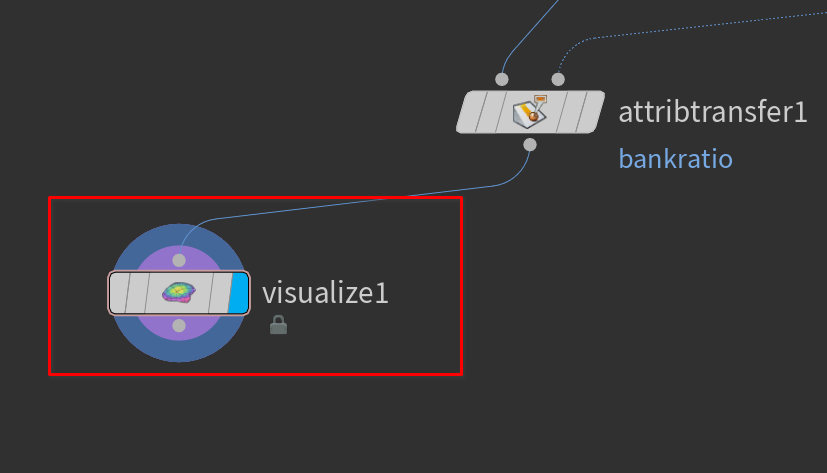
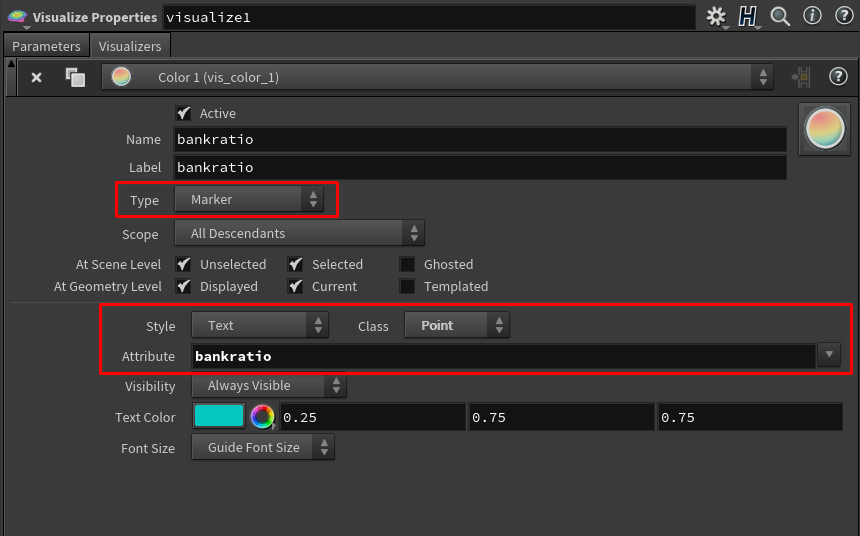
This will let us see the values of our attribute in the viewport.
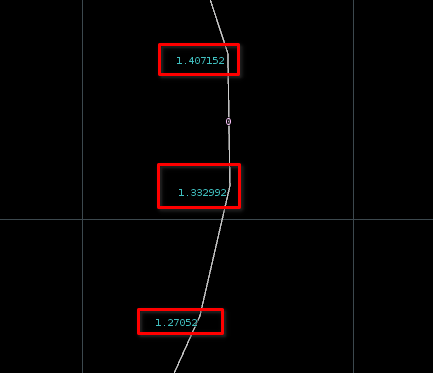
Next we need to remap these values into a usable range. -1-1 that way math will work better down the line.
-1-1 and 0-1 range is also very common programming, gamedev, and CG because it gives you a good starting point for other mathematics.
Remapping Values
there are many ways to remap values in houdini. see remapping values in houdini
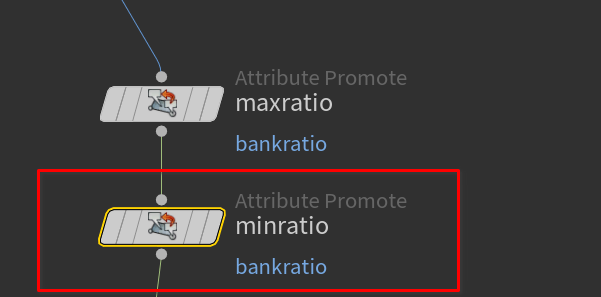
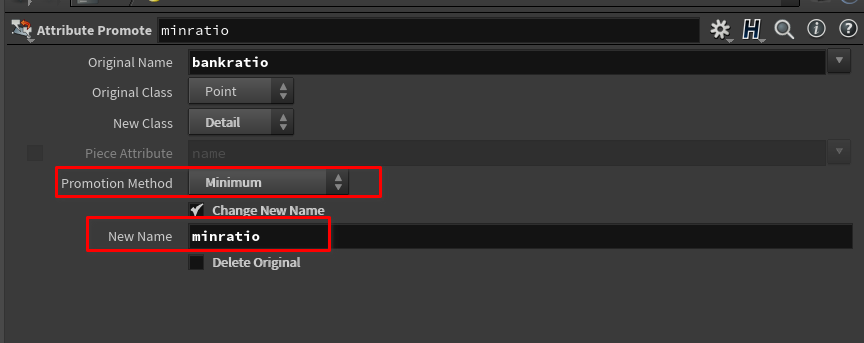
Let’s drop down an attribute promote SOP.
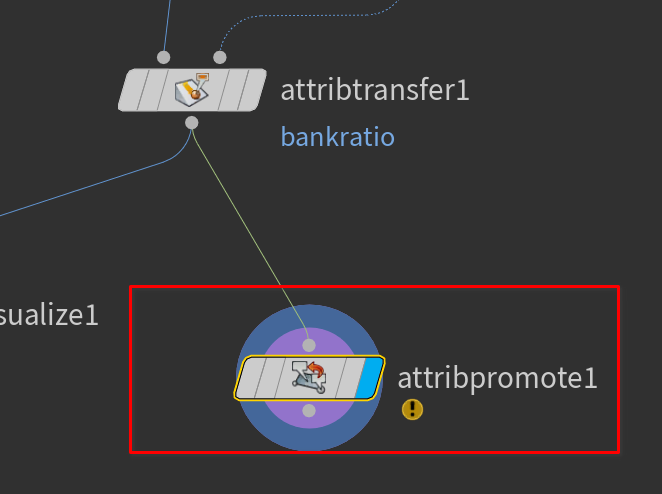
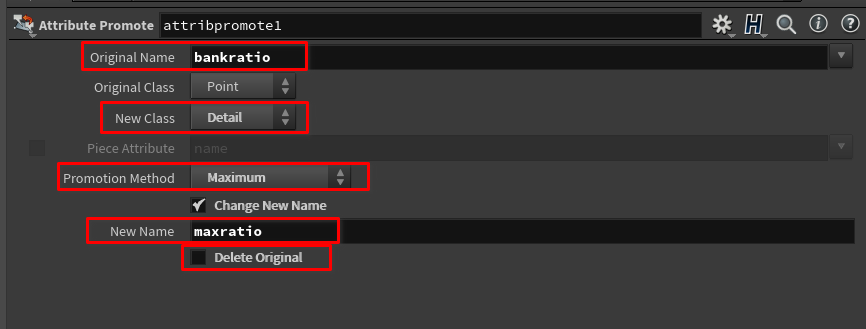
We’ll take the bankratio attribute and promote it to a detail attribute. Then set the promotion method to maximum. This will get the highest value. Then create a new attribute called maxratio and make sure we don’t delete the old one. Then copy that node and change it so we get the minimum.
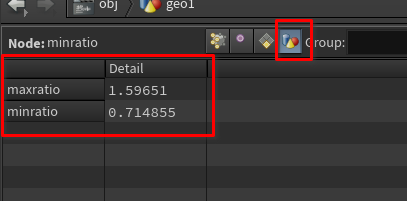
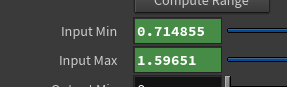
Now in our Geometry Spreadsheet pane we can see our detail attributes.
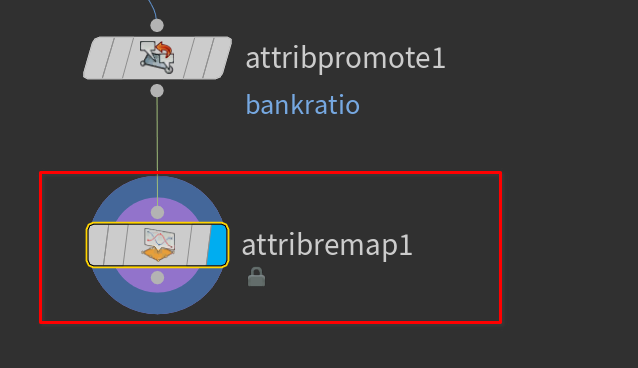
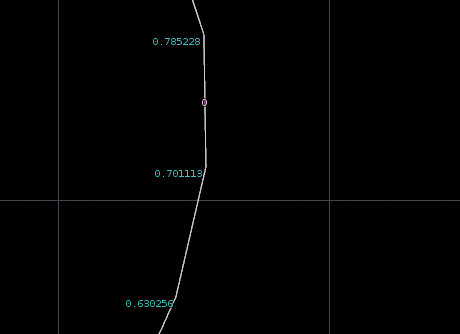
Next drop down an Attribute Remap node.
Now we want to remap the max and min we just created.
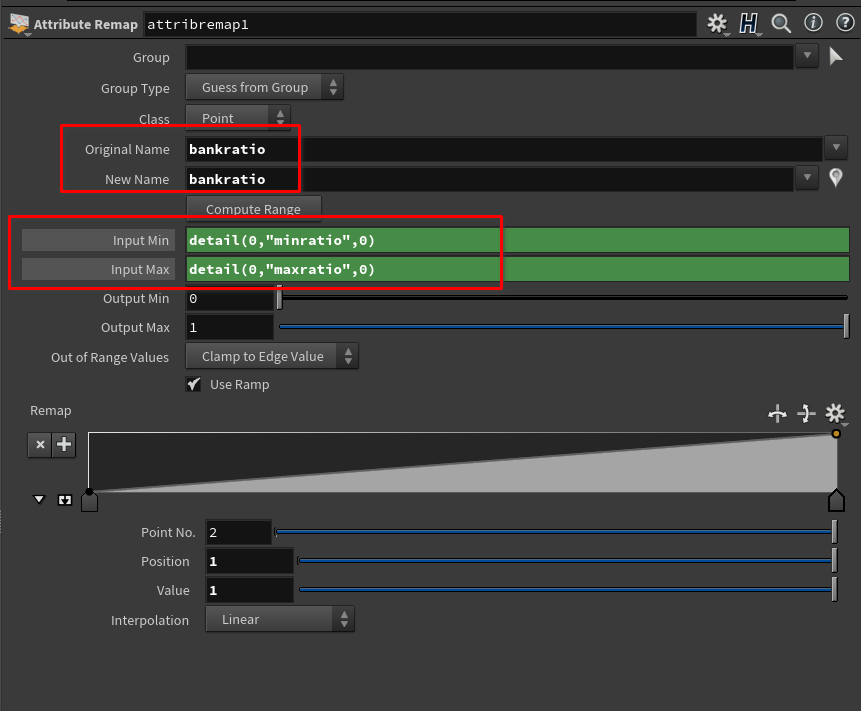
We will remap bankratio to -1-1 and then use the detail function to get the detail attributes we made for min and max.
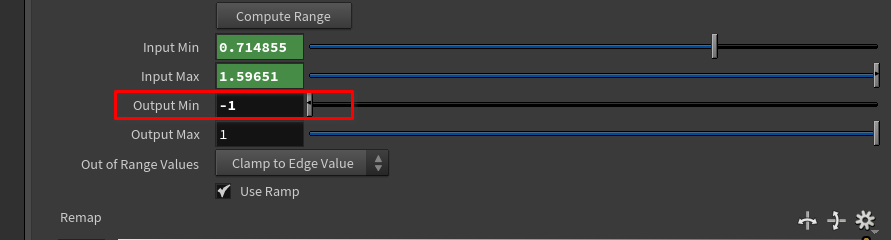
Now the bankratio is in usable values
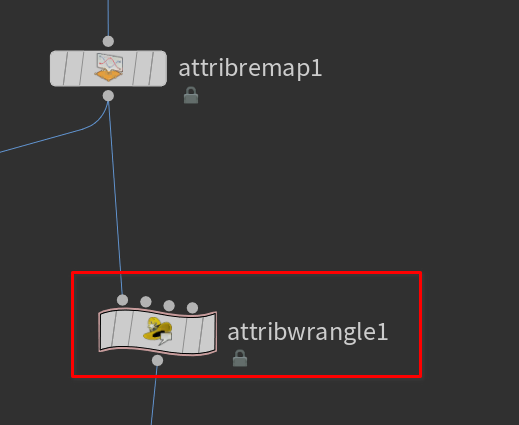
Next we will drop down a wrangle to do the rotation.
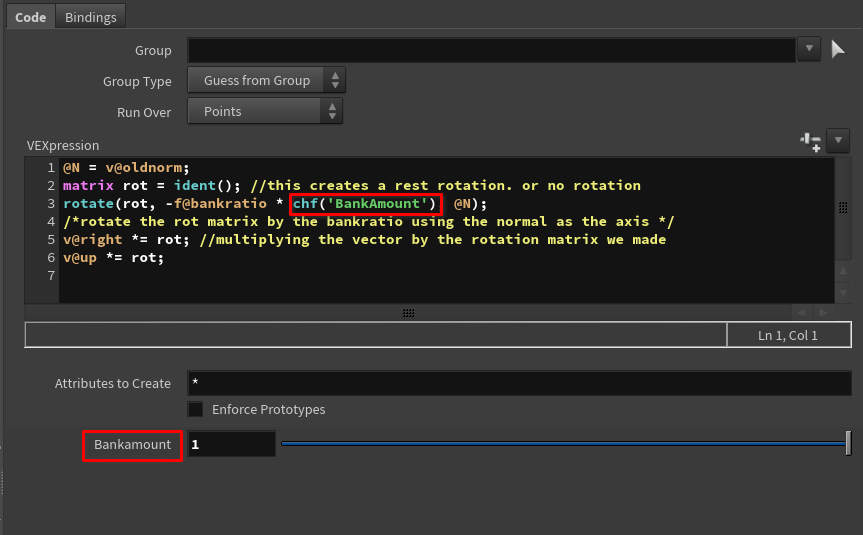
| |
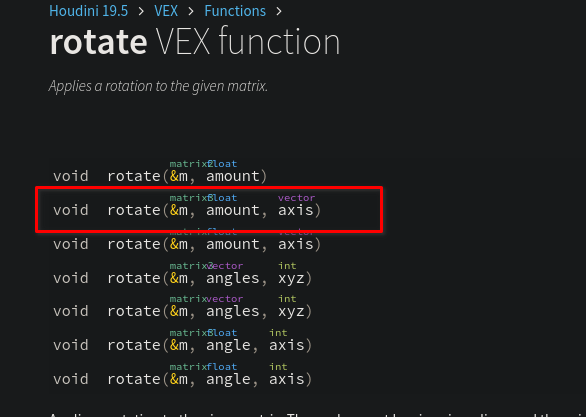
We are basically rotating our vectors using the rotation matrix we created with the rotate vex function.
bankratio
You may need to set
f@bankratioto negative if it banks the wrong way
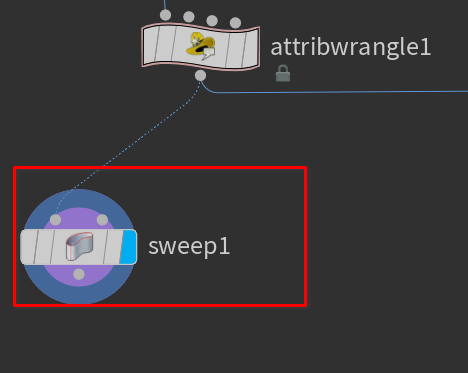
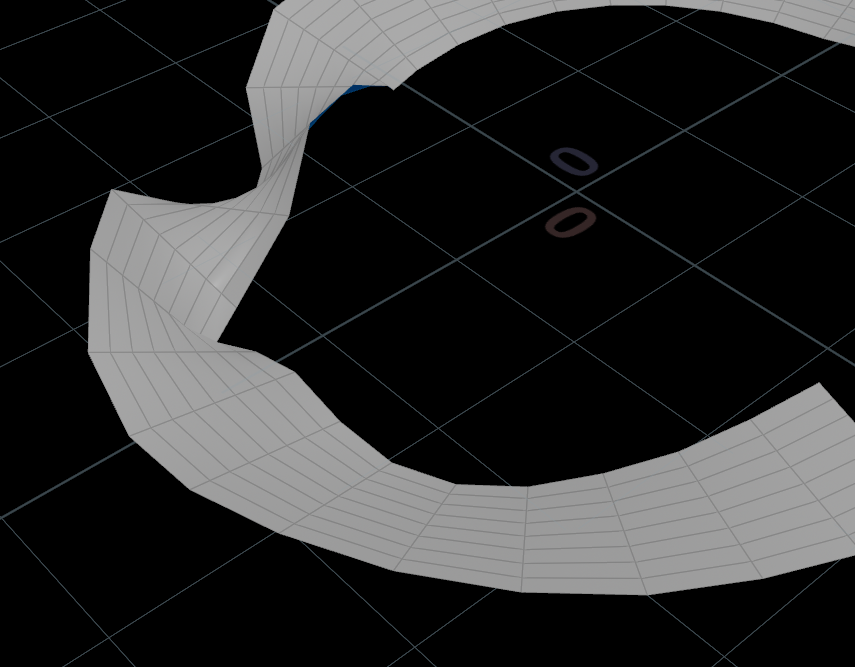
Then drop down a Sweep node.
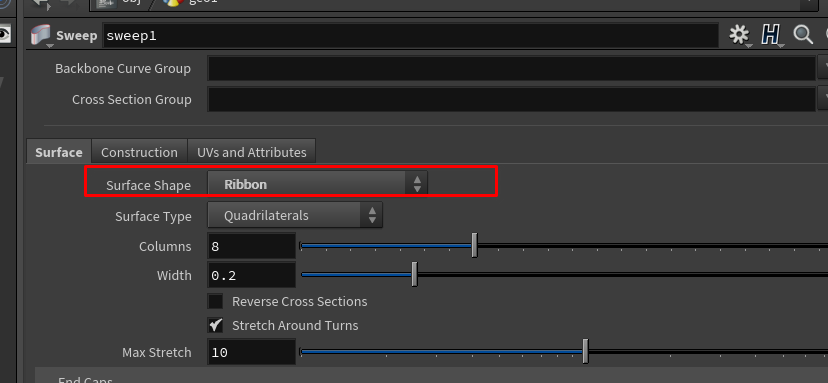
set it to ribbon to see the banking.
Then drop down a Peak node.
Scale the distance value a bit.
It should like this in the viewport:
Next drop down another Attribute wrangle node.
and attach both the original and the peaked stream. Here we will be comparing the length of the two primitives.
Make sure this wrangle is running over primitives
| |
The first line we are using the prim function.
The 1 indicates we are using the second input of the wrangle.
restlength is the attribute we are looking for. The one created from the convert line node.
@primnum means we want to do this for each primitive.
Next we need to drop down an Attribute Promote SOP.
And then make sure the we are promoting bankratio from primitive to point.
creating a subnet If you wish you can put everything into a Subnet by selecting all the nodes you want to use and pressing shift+c
Next drop down an Attribute Transfer SOP.
We want to transfer the bankratio attribute to the other curve.
Visualizers are an important part of a Houdini workflow. see houdini visualizers and Visualizers documentation
Let’s drop down a Visualizer node.
This will let us see the values of our attribute in the viewport.
Next we need to remap these values into a usable range. -1-1 that way math will work better down the line.
-1-1 and 0-1 range is also very common programming, gamedev, and CG because it gives you a good starting point for other mathematics.
Remapping Values
there are many ways to remap values in houdini. see remapping values in houdini
Let’s drop down an attribute promote SOP.
We’ll take the bankratio attribute and promote it to a detail attribute. Then set the promotion method to maximum. This will get the highest value. Then create a new attribute called maxratio and make sure we don’t delete the old one. Then copy that node and change it so we get the minimum.
Now in our Geometry Spreadsheet pane we can see our detail attributes.
Next drop down an Attribute Remap node.
Now we want to remap the max and min we just created.
We will remap bankratio to -1-1 and then use the detail function to get the detail attributes we made for min and max.
Now the bankratio is in usable values
Next we will drop down a wrangle to do the rotation.
| |
We are basically rotating our vectors using the rotation matrix we created with the rotate vex function.
You may need to
f@bankratioto negative
if it banks the wrong way
Then drop down a Sweep node.
set it to ribbon to see the banking.
# Result